The Startup Content Studio: Everything You Need
Announce features, host guests, talk to your audience. Without hiring a crew every time.

tl;dr: Below is a practical guide for startups and venture capital firms interested in building a content studio. It includes everything you need to buy, why you’re buying it, and what makes content compelling.
I’ll be working with exactly 2 startups on custom studio builds in Q2, including end-to-end content production. DM @bephrem if interested. Otherwise, this article gives you all the basics to get started yourself.
The full shopping list is here. You can jump to the build section if you’d like to skip the intro (it’s lengthy).

The Problem
Every startup has the same basic problem. You ship features every week, and you want to talk about them to the public. To do this, you need to commit your voice and image to film in a compelling way, so you can speak to thousands of people. Potential customers, employees, and investors. This problem repeats every month. It never goes away.
You consider your options. You could:
(1) Hire a Crew, Shoot In-Office: A camera crew will come, spend 2 hours setting up lighting and 2-3 cameras, then charge a flat day rate (maybe ~$3-8k) just for footage. Across 4-5 videos/mo $12-40k in content spending. This is unsustainable. I’ve observed this setup process dozens of times. It requires a location scout every time, with new lighting & sound considerations. You get 1-2 pieces of content, w/o integrated consideration of a communications roadmap for the company. And most offices don’t look good; they look like startup offices.
(2) Hire a Crew, Rent a Location: You can rent one of the few filming locations that look good in San Francisco, then run your own camera setup, or work with a crew. This is also not ideal as it takes you out of your office and the flow of your day. You face the same setup / teardown problems, although you get good production design for “free” (but even then you get a generic look that isn’t tailored to your company & the tone you want).


(3) Buy Gear & Film Yourself: This seems like an enticing option; you just need to buy an FX3 & some RODE Wireless Go’s, right? Until you realize that compelling film work actually has many moving parts that make it watchable:
Writing: What are we actually going to talk about (topic selection + framing)? At what timestamp do certain important points land (estimating watcher attention span + runtime)?
Cinematography: There are many invisible principles to making an image “easy to read” to the eyes & pleasing to look at. Almost no one is getting them right on X & LinkedIn. You need to know the rules behind lighting and composing an image, which are non-obvious.
Production Design: Every pixel of the frame must be load-bearing. Almost no one is designing their sets with a unique identity that is an extension of their product’s visual language. The same care put into a digital design system (typography, color, spacing) — should extend to the physical world.
Performance (Acting): The most important visible component is how the people on-screen make the watcher feel. Does the presenter transfer good energy to the watcher? Does this host-guest combo have good chemistry? This is what keeps people watching and brings them back. This takes an eye for what isn’t there in a performance.
Sound: Most videos on X & LinkedIn have mediocre sound. Not that important if the content is good, but gives a presence boost for the watcher if they can clearly hear the speaker, and the spatial logic of the room can be felt. Good sound lets people watch longer and more easily. Getting dialog polish right can completely change how an image is felt.
Music (Score): The music needs to be in conversation with the rhythm of story information unfolding. It will need to hit at certain moments, and supplement the overall tone of the performance.
Editing: Picking the best takes that cohere. Graphics. Motion.
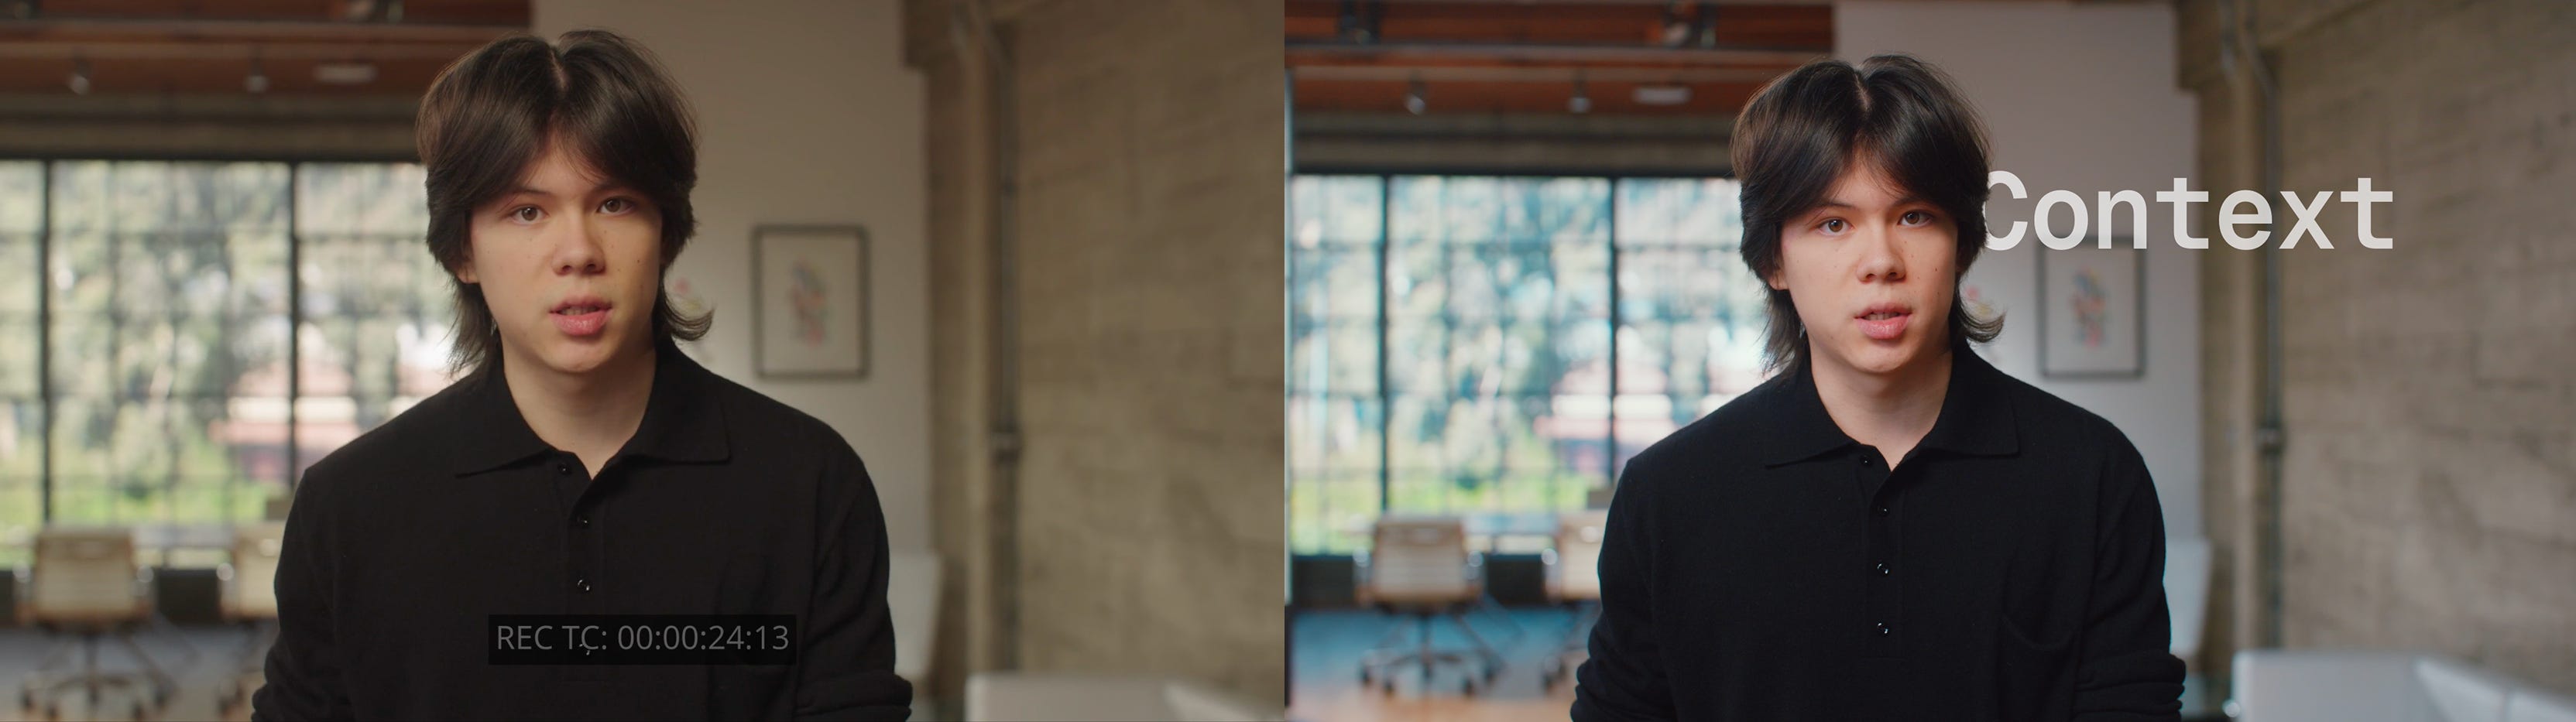
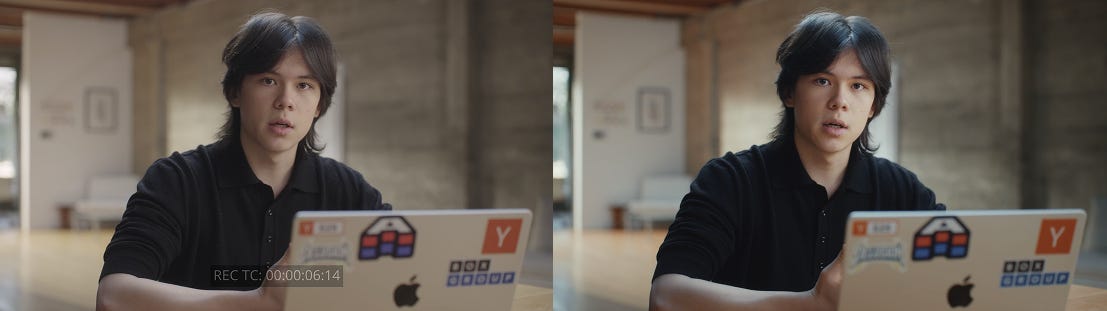
Coloring: Footage needs to get colored. This seems optional until you see a before & after of footage that has been properly colored. Below is a before & after from a recent shoot I did with @arlanr, with my coloring treatment notes. Coloring can profoundly transform how an image reads.
You can see how the needs of the medium stack up. Founders with growing companies don’t have the time to run a production process end-to-end like this.
(4) Hire a Freelancer or Head of Media: Find a pluralist visual thinker who is also mission-aligned with your product. Not impossible, but difficult. Most freelancers don’t have rigorous film training. And most of the best visual artists don’t care about B2B SaaS or AI. Some will. The best ones will be thinking about the above.
(5) Hire an Agency on Retainer: If you’re at the stage where you can afford an agency, you can hire them for larger brand campaigns or recurring content. Once a large brand campaign is delivered, agencies operating at that level will have to context-switch to other large productions for other companies. Recurring content producers work with many clients and won’t embed with you at an organizational level. What is really needed is a producer deeply embedded in the product, tracking changes every week, suggesting new pieces — fully in the loop.
(6) iPhone: Just use an iPhone. If you have something really raw & true to say, iPhone and room audio (“low production value”) could connect even better. But for most regular content, this just makes it harder to look at & hear you.
(7) Do Nothing: Many startups just don’t produce content when it would be low-hanging fruit to do so. I see this all the time. Founders with good engagement on text posts & compelling personalities that would do well on-screen — that just never have the time or consider making videos regularly.
…
Most of these aren’t permanent options. 5/7 are temporary fixes. The ideal scenario is that you own the means of media production. A permanent studio (whatever the scale) built around your company’s identity, producing content on your schedule, indefinitely. To understand why this matters, let’s look at what media even is, from its cultural to its commercial applications.
Media and Story
Media is how we form and shape our understanding of the world. As much as we’d like to believe we are “independent thinkers,” our thoughts and beliefs are primarily constrained by what we have seen and what we have heard throughout our lifetimes. Born ignorant, through a series of media transformations, we come to an understanding of the world. We are perpetually at the mercy of what we are shown and not shown (narrative constraint).
Media’s existence is necessitated by a hard physical constraint. We are born to separate bodies & minds that need to constantly sync to a relatively aligned view of the world for things to get done. This alignment problem is as old as human cooperation. Storytelling is the first technology ever invented to solve this coordination problem.

Story sits inside media as latent structure. It encodes the patterns we impose on experience to make it meaningful. A beginning, a middle, an end — causality. Character. Stakes. Story is a cognitive structure that makes experience transmissible. Without story, there are just events without a prescribed meaning. When media with story information is consumed, experience is transmitted.
Forms of Media
There are many forms of media, each shaping how meaning moves through the world:
Oral (the first): Spoken word. The original medium — no technology required. Every civilization developed it independently.
Image (the 2nd): Painting, drawing, photography. Static visuals making the seen world persistent.
Written (the 3rd): Text on a surface. Thought made portable, permanent, and copyable.
Audio (Recording): Music, podcast (longform speech). Recordings freed oral storytelling from real-time constraint and made it portable for the first time.
Cinema (Film/Video): Moving image + sound + time. The most complete simulation of lived experience humans have ever built — addressing sight, sound, motion, and emotion simultaneously.
Broadcast: Television and mass radio. One-to-many at scale for the first time. A single signal reaches every home simultaneously, creating shared monoculture and centralized narrative power.
Print: The Gutenberg press made writing infinitely copyable and cheap. For the first time, one person’s ideas could reach millions without distortion, enabling mass literacy, mass politics, and mass religion.
Digital/Internet: All previous forms containerized and delivered over a near-instant network. The first truly bidirectional medium at scale.
Social Feed: The current dominant form — an infinite, algorithmically sequenced scroll optimized purely for attention capture.
LLM Chat: The newest layer. Many now treat AI conversations like their closest advisor. Extraordinary narrative power that’s still under-discussed.
I’m probably missing other ones (games, live interactive media, and on and on). But these are all ways that meaning moves through the world. Your company needs to be fluent in at least one of them.
Media is Infrastructure
I wanted to lay the above foundation because most of the technology industry has a very narrow understanding of what media is for or what it can do. The industry term for commercial media is “content”. A container word treating every medium as a pipe, and whatever flows through it as an interchangeable commodity. It reduces the most complete simulation of lived experience humans have ever built to a unit of marketing output.
As someone who has spent 400+ hours watching cinema in the past year, it is clear to me that media is far more than marketing collateral. It is a transformation mechanism. Taking people from point A to point B in their understanding of your company, the product, and the world. Most companies reason about their narrative on a very narrow time-horizon (<3mo) and scale of impact (“let’s share this feature we just made”).
Founders will usually finish a feature, realize they need a video for it, reach out to their immediate network for a videographer, record a video, publish it, and then be done.
Venture capitalists will usually have a portfolio of interesting founders they can talk to, bring them onto some sort of long-form show or podcast, record a 1-hour video, publish, and then be done.
If we’re honest, this is the state of storytelling in tech for 80-90%+ of companies and venture capital firms. Wholly uncreative, yet functional. It works (and really well sometimes), because (1) the quality bar for storytelling on X & LinkedIn is incredibly low and (2) inventory is incredibly low relative to demand (attention surplus).
Few companies are treating their media as infrastructure. Just as product infrastructure is planned and roadmapped with total seriousness and permanence, a company’s storytelling infrastructure needs to be equally as considered.
Most startup problems are downstream of storytelling:
Acquiring Talent: The best talent works for companies worth joining. The companies worth joining are telling the best stories about why they exist and why they’re going to win.
Attracting Capital: Venture investors pattern-match on conviction before they take a meeting. Public media is your first pitch. Most founders don’t realize how much due diligence happens before anyone reaches out or replies to inbound.
Acquiring Customers: People buy from companies they trust. Trust is built from repeated contact over time — not a single video. The accumulation of consistent presence is what moves someone from aware to convinced.
Retaining Employees: Employees rally around a strong why behind the work they’re doing. Stories about what you are building create this shared bonding mechanism and keep people tethered to why they’re building.
Public Perception / Positioning: Your public narrative shapes how the industry positions you relative to competitors over time. You either shape it or it shapes itself without you.
Good media strategy is simply an organic multi-year conversation you have with the world about who your company is and why it exists. It is a cloud, a consciousness, built and pointed in your direction. Every point of contact makes people feel what it is like to use your product and work with you.
Non-Linear Effects: While product functionality is immediately measurable (it works or it doesn’t), the impact of stories a company tells about itself are only observable in a very long-range, non-linear way. You might release a podcast episode that someone listens to in 3 months, then returns to your venture firm in 3 years for an eventual investment. There was no way to track this ROI because the effects were impossible to measure and they spanned years. You just have to trust it’s happening and “read the room”.
X & LinkedIn Are Underproduced
This is hard to see if you aren’t a video publisher, but X & LinkedIn are heavily underproduced for video, and the X & LinkedIn algorithms are very generous in awarding reach.
3 months ago, right as I was thinking this, a post from @_kaitodev came up in my feed that captured this well:
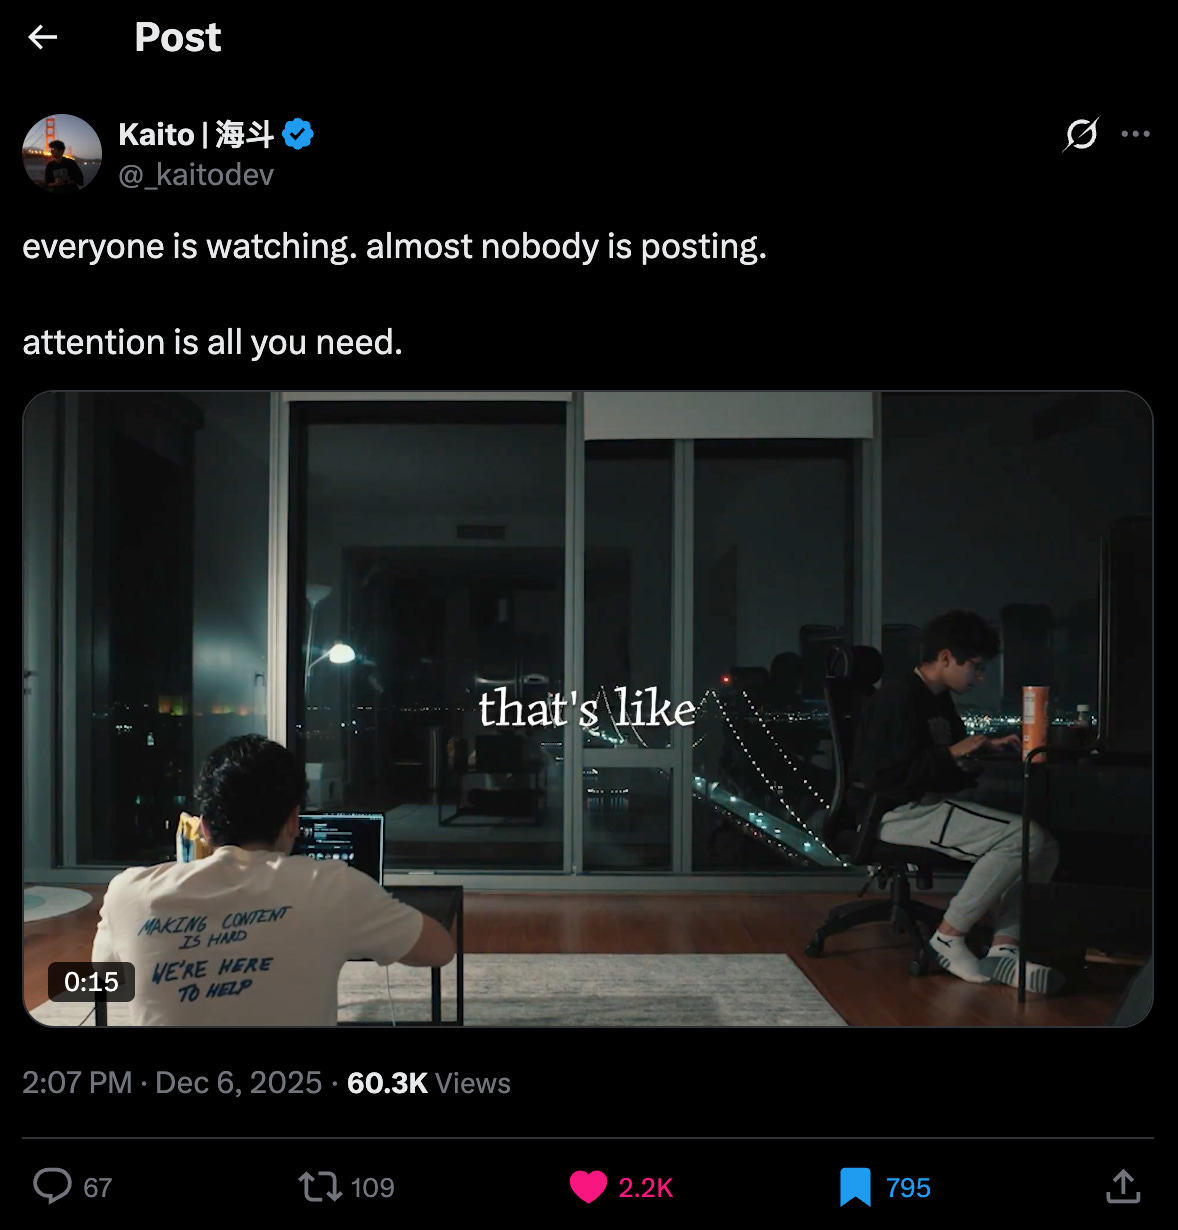
Here is the tweet and here is the transcription:
“Content creation is vastly unexplored. You have a billion users on LinkedIn, and like 3 million active posters weekly. That means that’s like 997 million are not posting at all. Lots of people want to consume. Not a lot of people are producing. Please, make content. You have big attention that you can get. And money :)”
And I quote tweeted:

I don’t have extensive data to confirm this attention surplus, but I have empirical evidence just from…observing how videos have performed on X over the past 3 years. I closely study how views are served minute-by-minute, hour-by-hour — where posts top out, how topics surface and subside, how the “For You” feed builds itself. And it’s pretty clear that reach on X is pretty easy right now, even without highly polished film work.
And these aren’t fake views, these are real people becoming convinced and changing their opinions about whole industries & companies. This is a new media platform sitting right under people’s noses, and it’s invisible for those w/o the data to see clearly.
TBPN Owning Broadcast
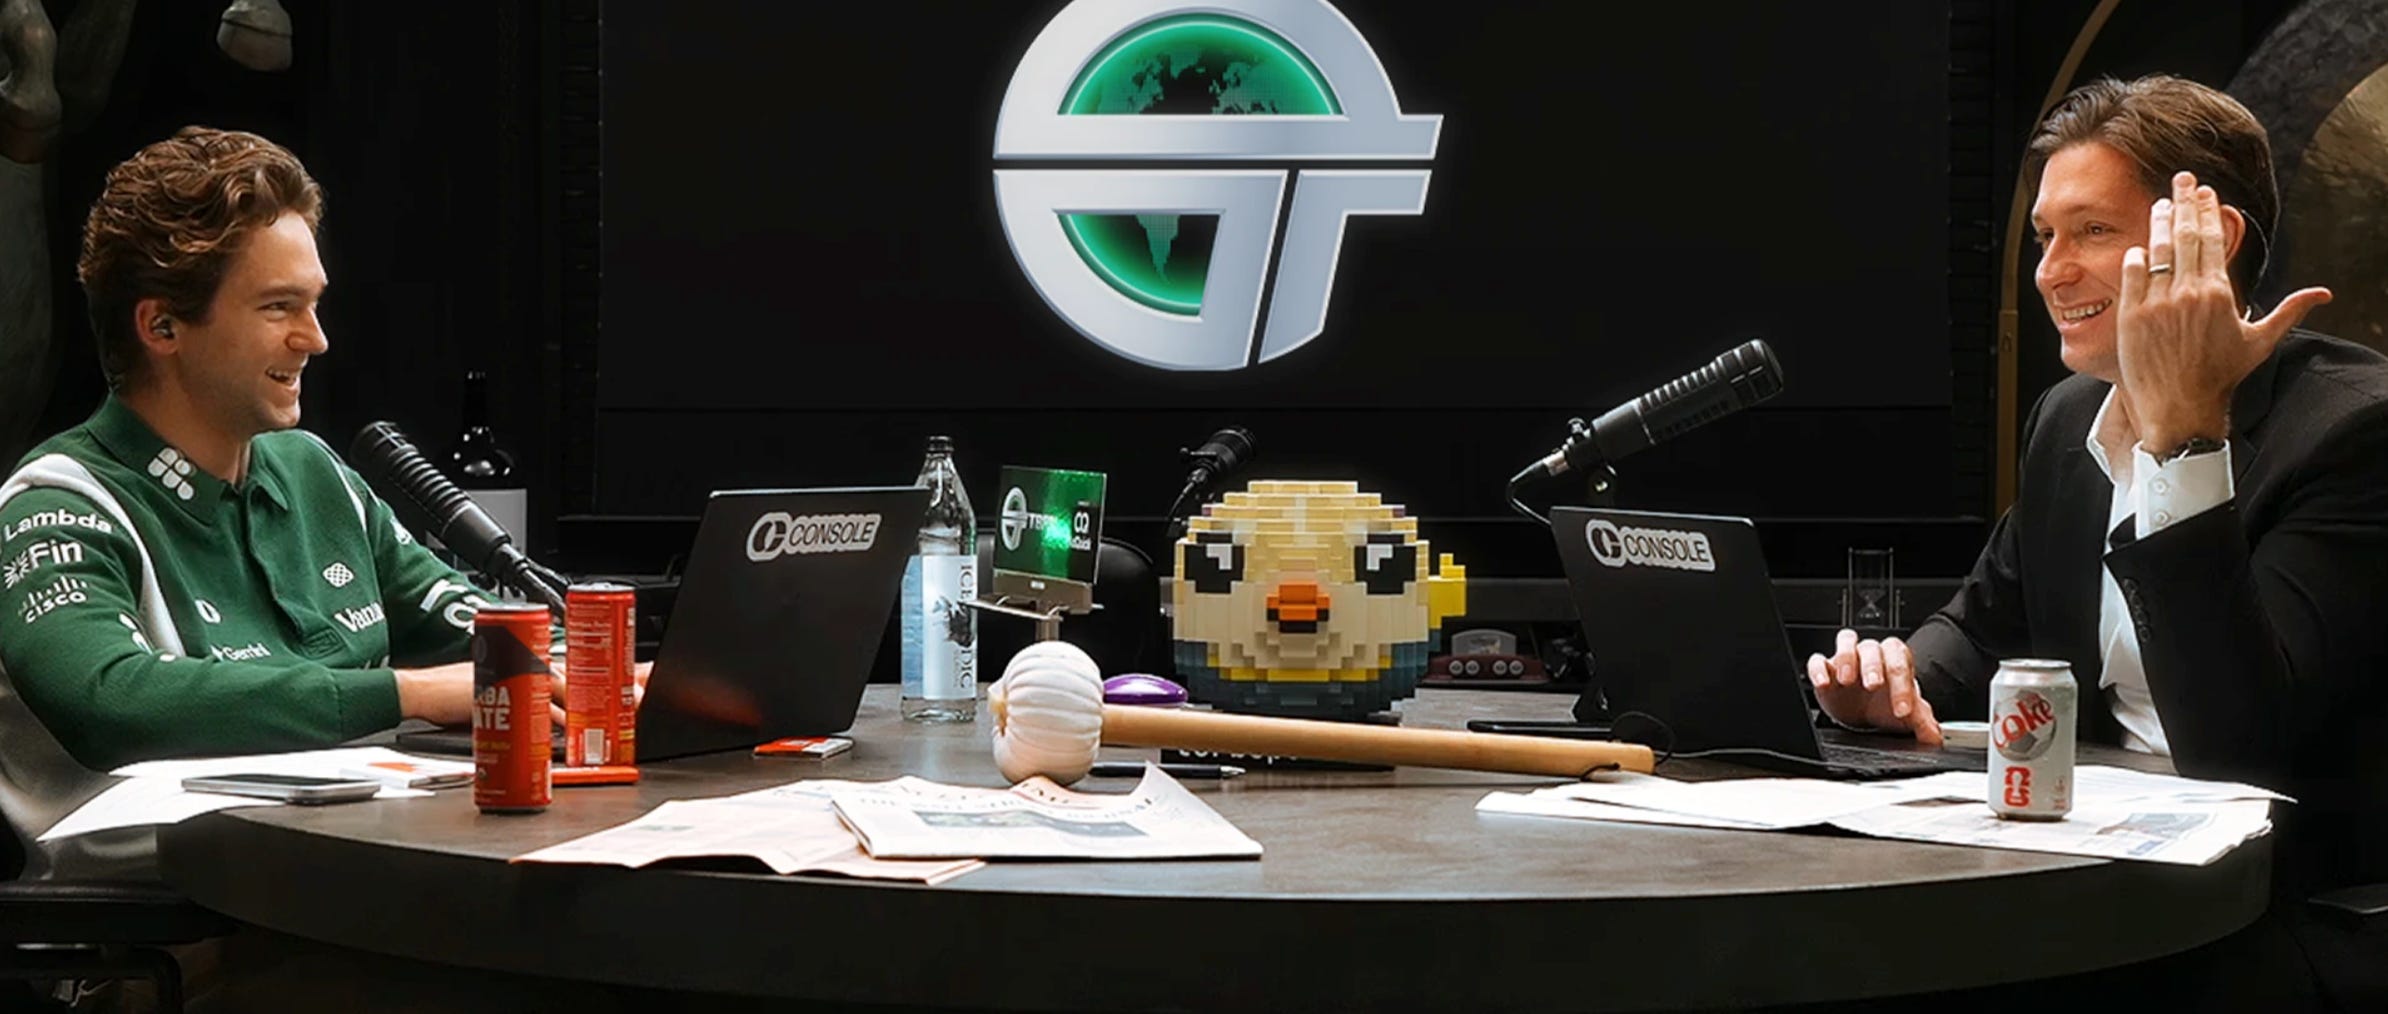
Somewhere along the journey, TBPN must have realized this gross attention surplus. They started the show informally (in Oct 2024), but on some level, they probably felt there was a missing media platform they wanted to see. This platform was specifically broadcast. A whole industry opened the X timeline daily, and there was no real-time news source with trusted face(s) to help the industry (and the world) make sense of it all. John & Jordi were perfectly suited to do this work due to their backgrounds, but even at the time, no one was taking tech media seriously.
It was sitting in plain sight. To own the narrative of the most powerful industry in the world you just had to (1) be the right people to do the job (of course), Jordi & John have the exact chemistry, charisma, and level of insight to even host and make the show what it is (2) hire a producer and a ton of interns in LA to rip content into the X & LinkedIn feed (while posting on YouTube, Instagram, & TikTok as tertiary platforms).
Fast-forward 1 ½ years to a $100M+ acquisition (“low hundreds of millions”) by OpenAI.
TBPN is an X-first media platform, with 333k+ followers on X, 30k+ on LinkedIn, 70k+ on YouTube, and 30k+ on Instagram. This is the first time that a big dollar sign has been placed on the trust and attention of a whole industry. Now with a market cap, X-first, “tech media,” is legitimized for the first time in its nascent 2-3 year existence.
The Conclusion
If you are a startup where your audience is primarily on X and LinkedIn, you should begin producing video content for the platforms. There is real money in trust, customer attention, and positioning being left on the table that is far lower than the cost of building a studio and producing.
The following will explain how to do this.
The Studio
Foundations
The best way to explain a studio concept to you is through example. Showing you what good writing (dramatic structure), cinematography, production design, performance, sound, & coloring look like. If you understand the basic principles of a fixed studio setup, you can extend it to various visual problems you’ll face.
I can’t cover 4 years of film school here, and none of the following is even a fraction of exhaustive. But the following sets a foundation for understanding the kit list later.
Cinematography
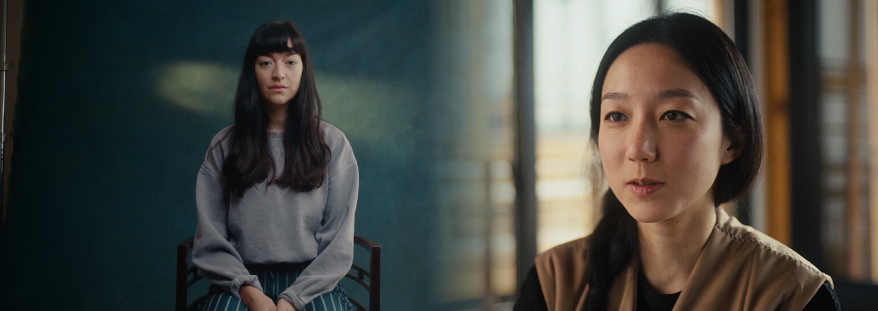
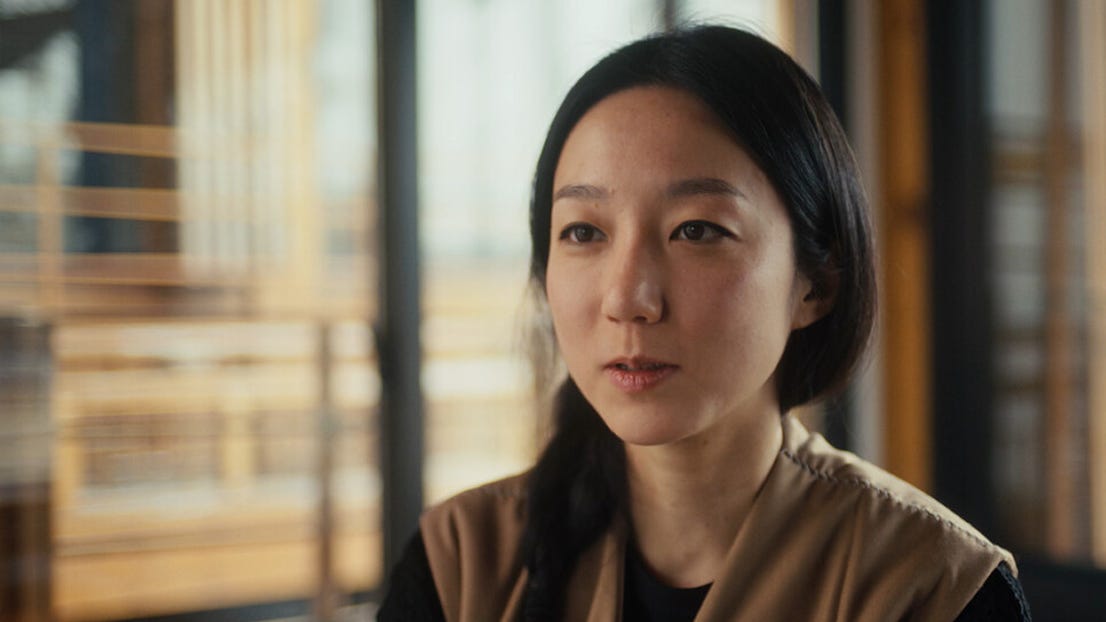
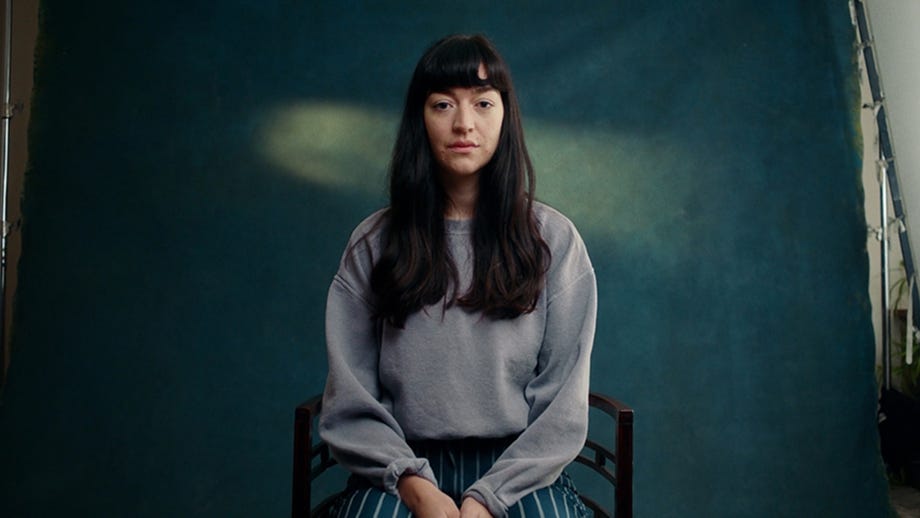
First, we will talk about the very bare basics of cinematography. We will work with the below sample video I shot with the great @jia_seed. The video is a personal narrative delivered in a sit-down format, compressed into a 1-minute Twitter attention span. Graphics are intentionally minimal; it is oral storytelling in a cinematic container.
Cinematography is the art of telling a story through moving images. When watching a video, people are “reading” the image, the same way they read a novel page by page. This reading happens very fast, and instead of reading letters, we read faces, body language, motion, color, exposure, objects, visual patterns, and on and on. What is around characters (production design) & how they are making us feel (performance) are all absorbed subconsciously.
Most of the story for our studio will be told through the production design of the set. Above, we filmed in Jia’s workspace in San Francisco. When choosing the frame I kept 6 key attributes in mind:
Area of Interest (Focal Point): What is the precise piece of the frame that the watcher’s eyes will be fixated on? Everything in the frame either works with or against this visual gravity.
Planes of Contrast: Our eyes are drawn to movement and contrast in a frame. Where are the areas of contrast in the frame (where sharp changes in color, exposure, or shape happen)? How do they interact with the focal point of the image? If you rewatch some of your favorite movies, you will find that actors’ eyes routinely get placed on hard lines of contrast in the image because our eyes move there.
Exposure: Exposure is the amount of light a region of the image receives. We want the face well-exposed. Effortless to read. Above, Jia’s face is very easy to read, the sky accentuating/highlighting the top region of the frame we are looking at.
Depth: How far back does the image reach? To reveal 3-dimensional space so we can inhabit it? The more depth an image has, the more story information we can absorb, which naturally creates interest. Most studios in tech lack depth.
Color: Jia’s wardrobe is coincidentally (and rightfully) muted to allow the exposure on her face to shine, making her easy to read and listen to.
A full breakdown video can be found here, as well as a breakdown PDF.
For our studio, the main principles for cinematography will be:
Make the face easy to read: Expose well for the face, if the space justifies, light for the space first then the face. Since we will just have 1 or 2 people talking, being able to read facial expressions will be critical. It’s the main mode of communication.
Find depth: We don’t want a flat photography studio look. Depth gives people visuals to chew on so they want to stay in the world they’re watching.
Control wardrobe: Keep it neutral and make it work with the overall set color.
Production Design
Production design is the intentional construction of space, furniture, light, color, texture, and objects within a frame to carry meaning rather than just occupy space.
Almost no one in tech is doing production design well. The current state of production design in tech is: laptop, table, books, wall.


Exhibit A (the tweet)
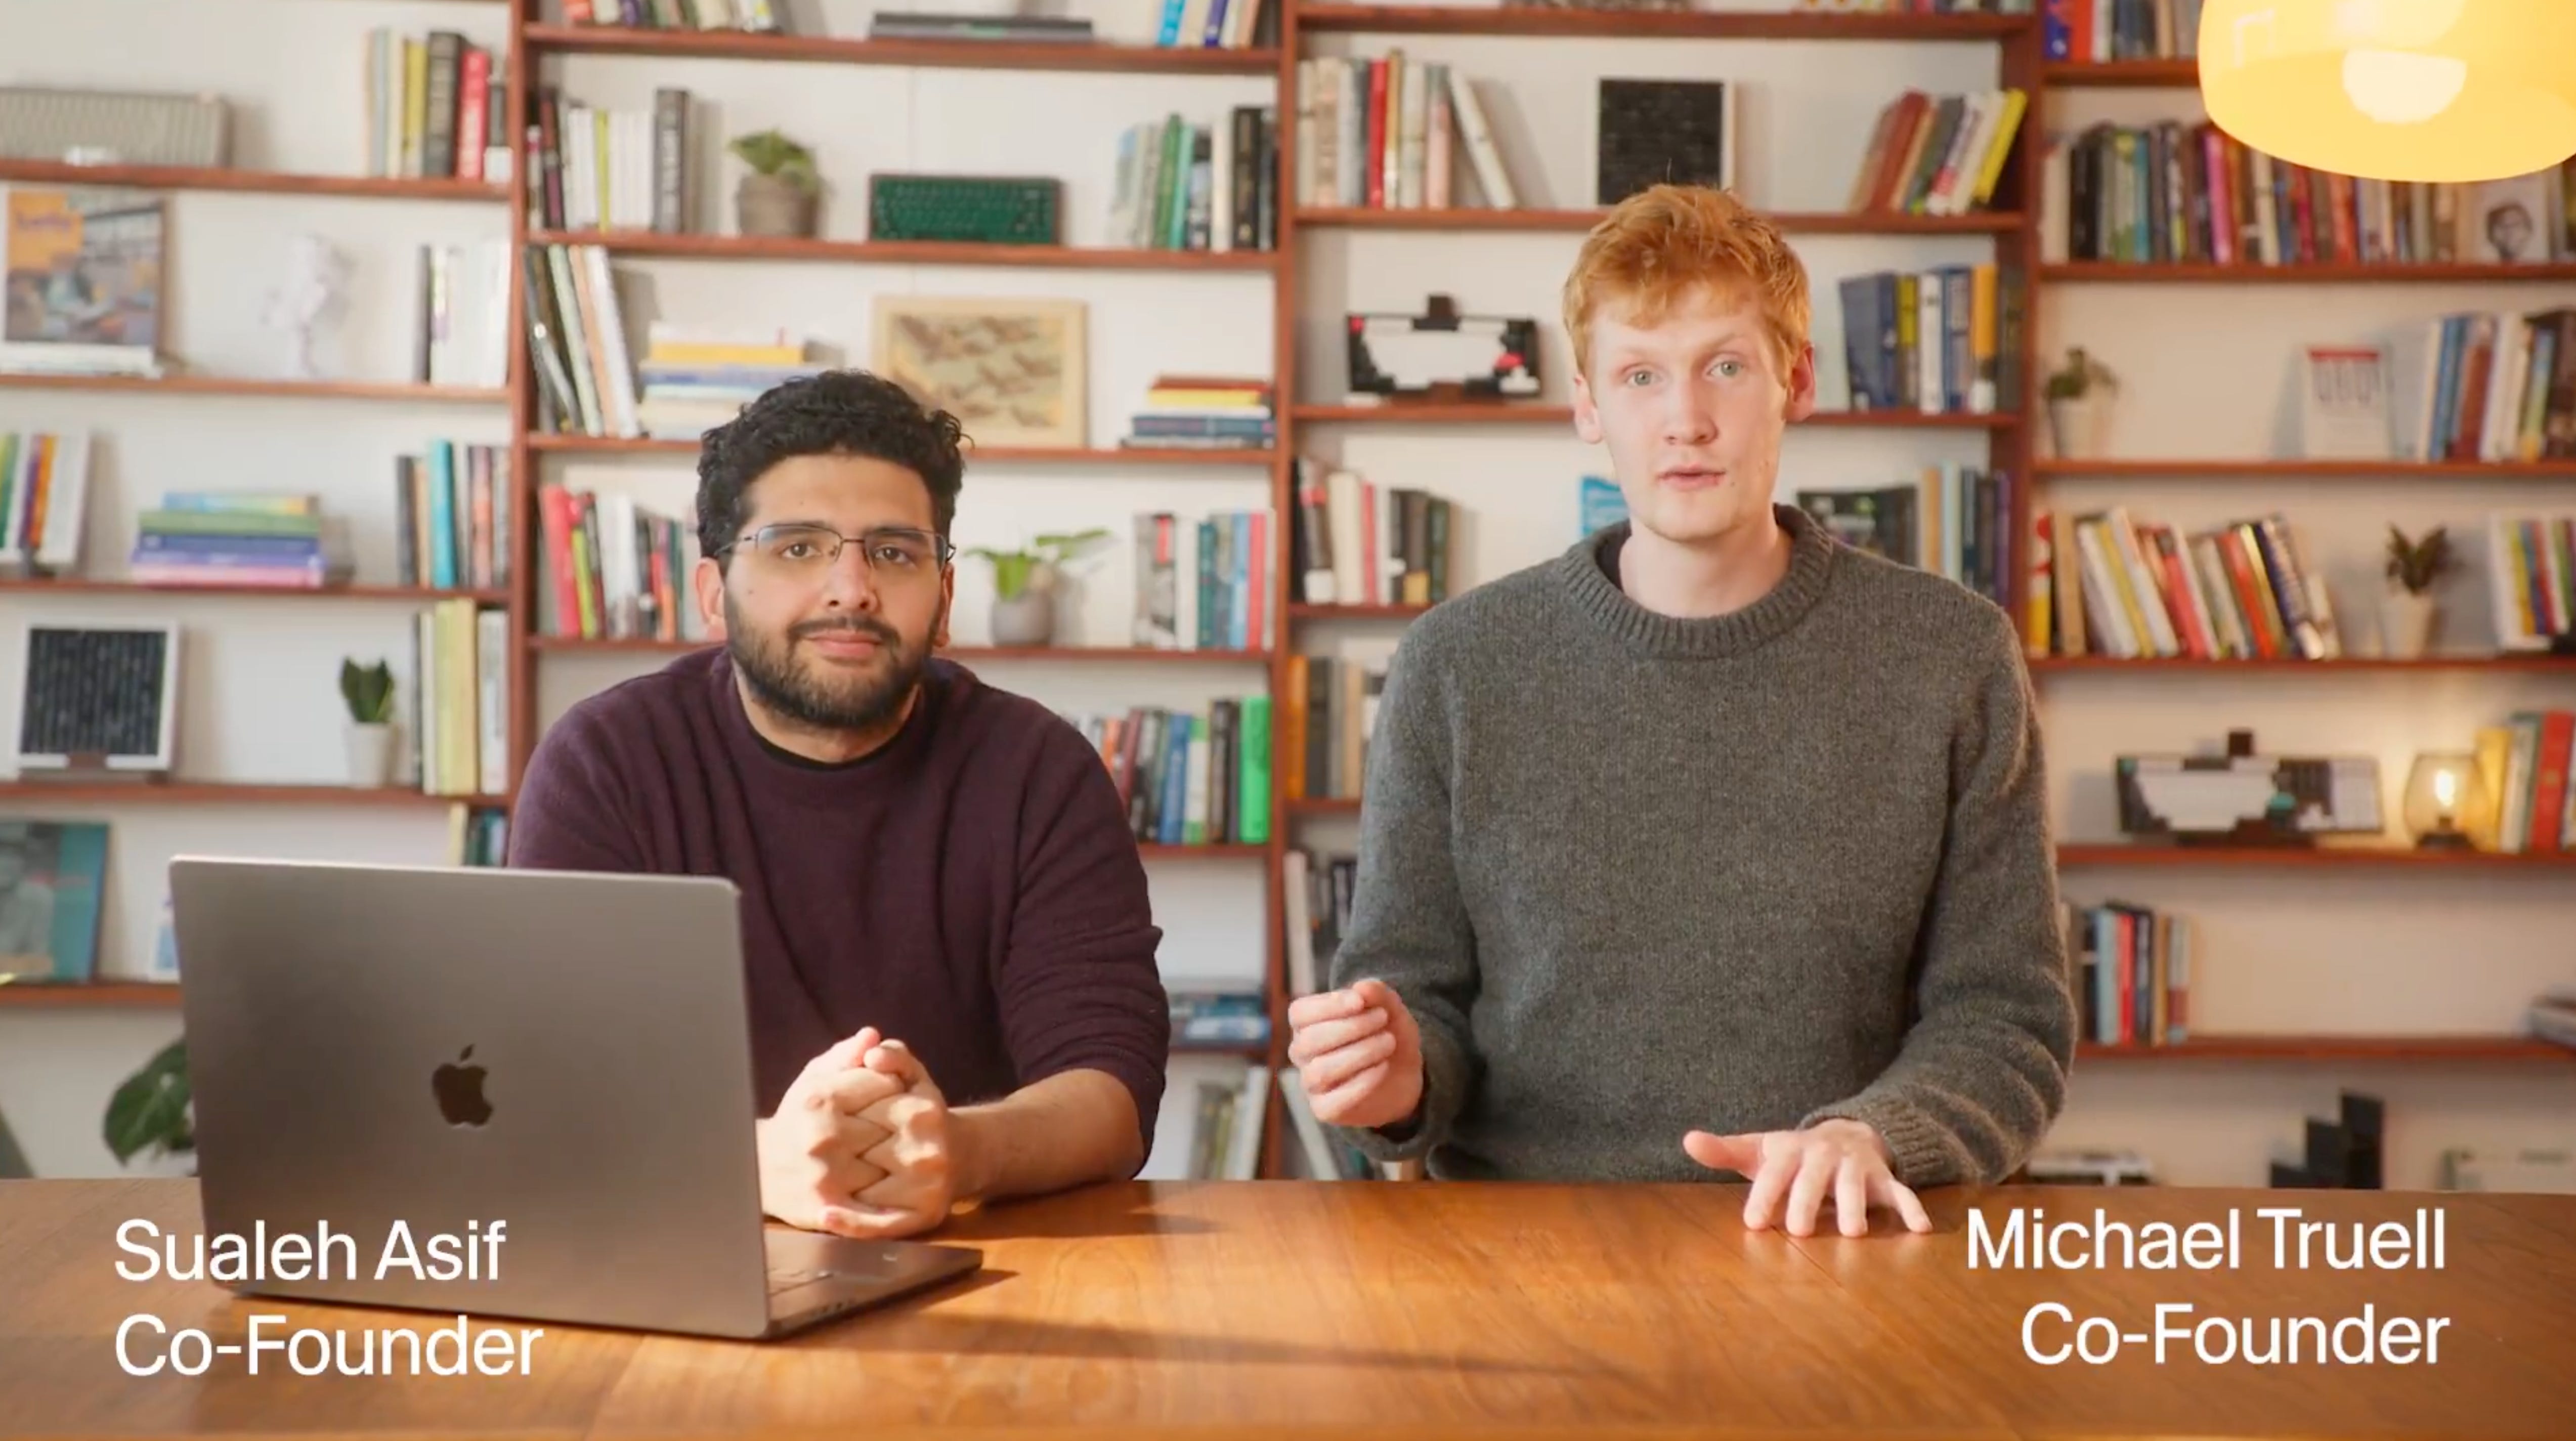
Exhibit B (the tweet, did 1M impressions mainly because of the announcement itself, but video definitely played a role in extending the reach)
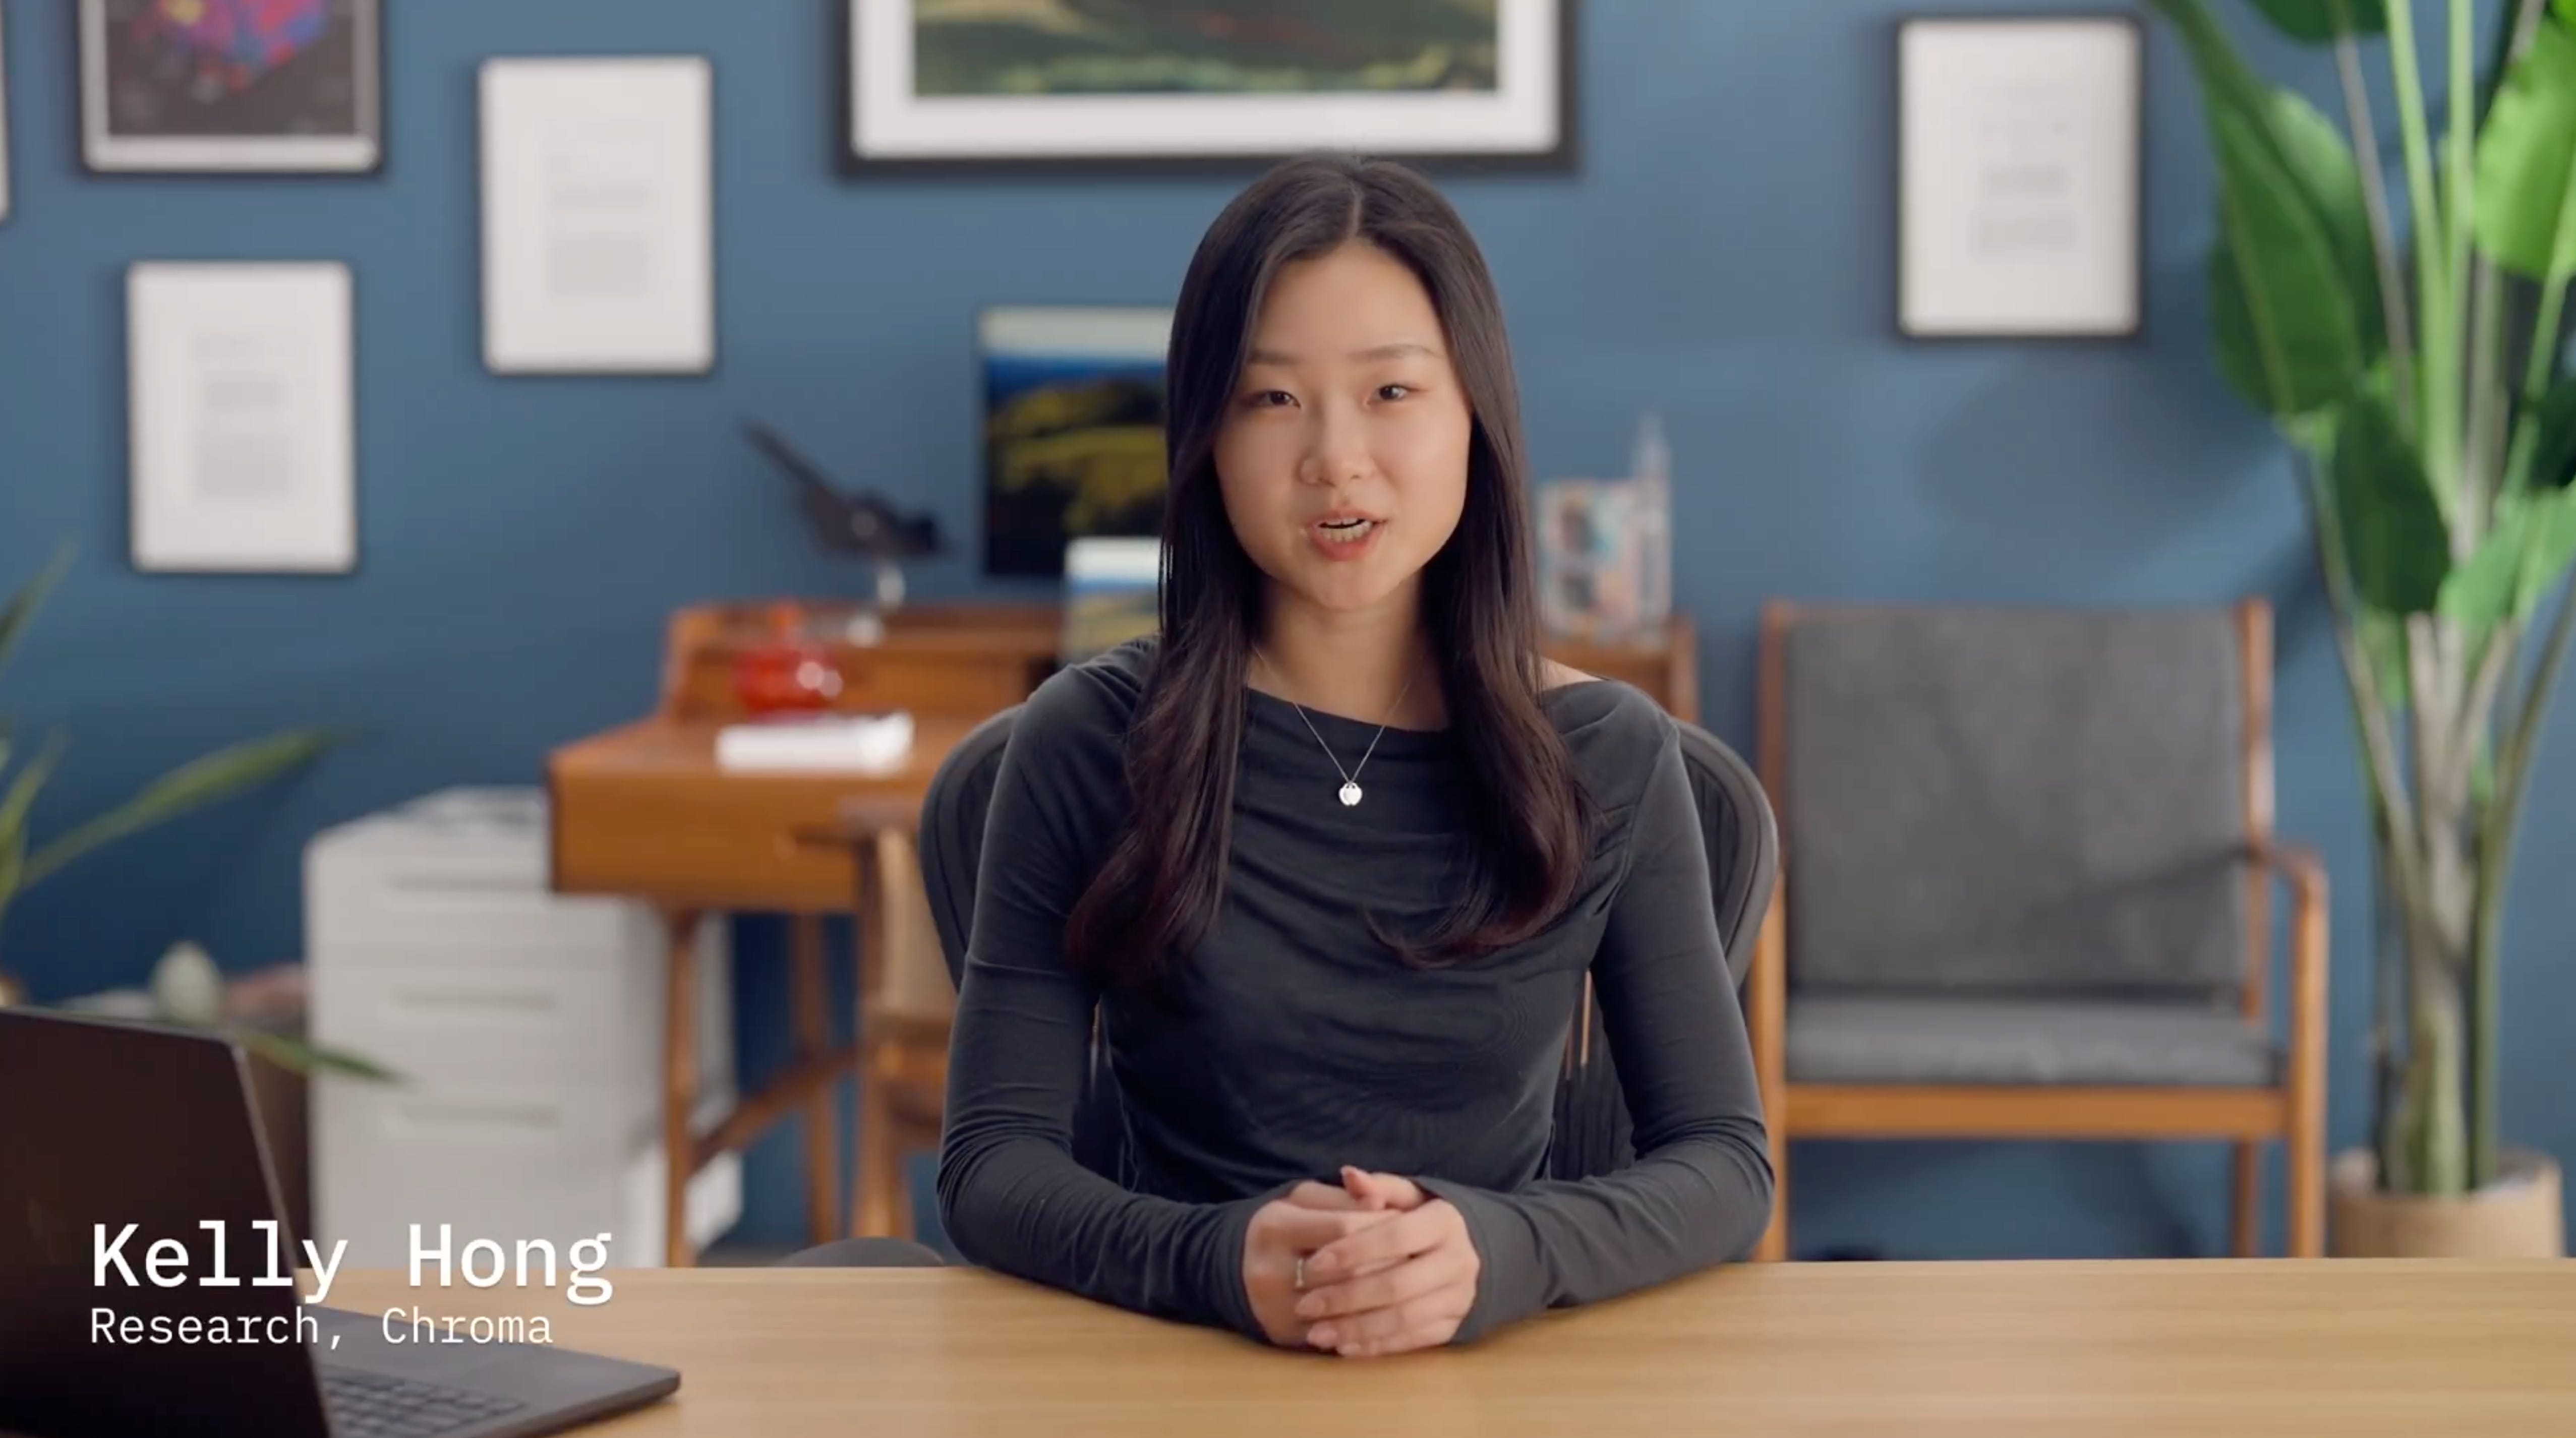
Exhibit C (the tweet, the most common studio design perpetrated — wood acoustic panels off Amazon + Shure mics on table + overhead lights flooding the room with exposure)
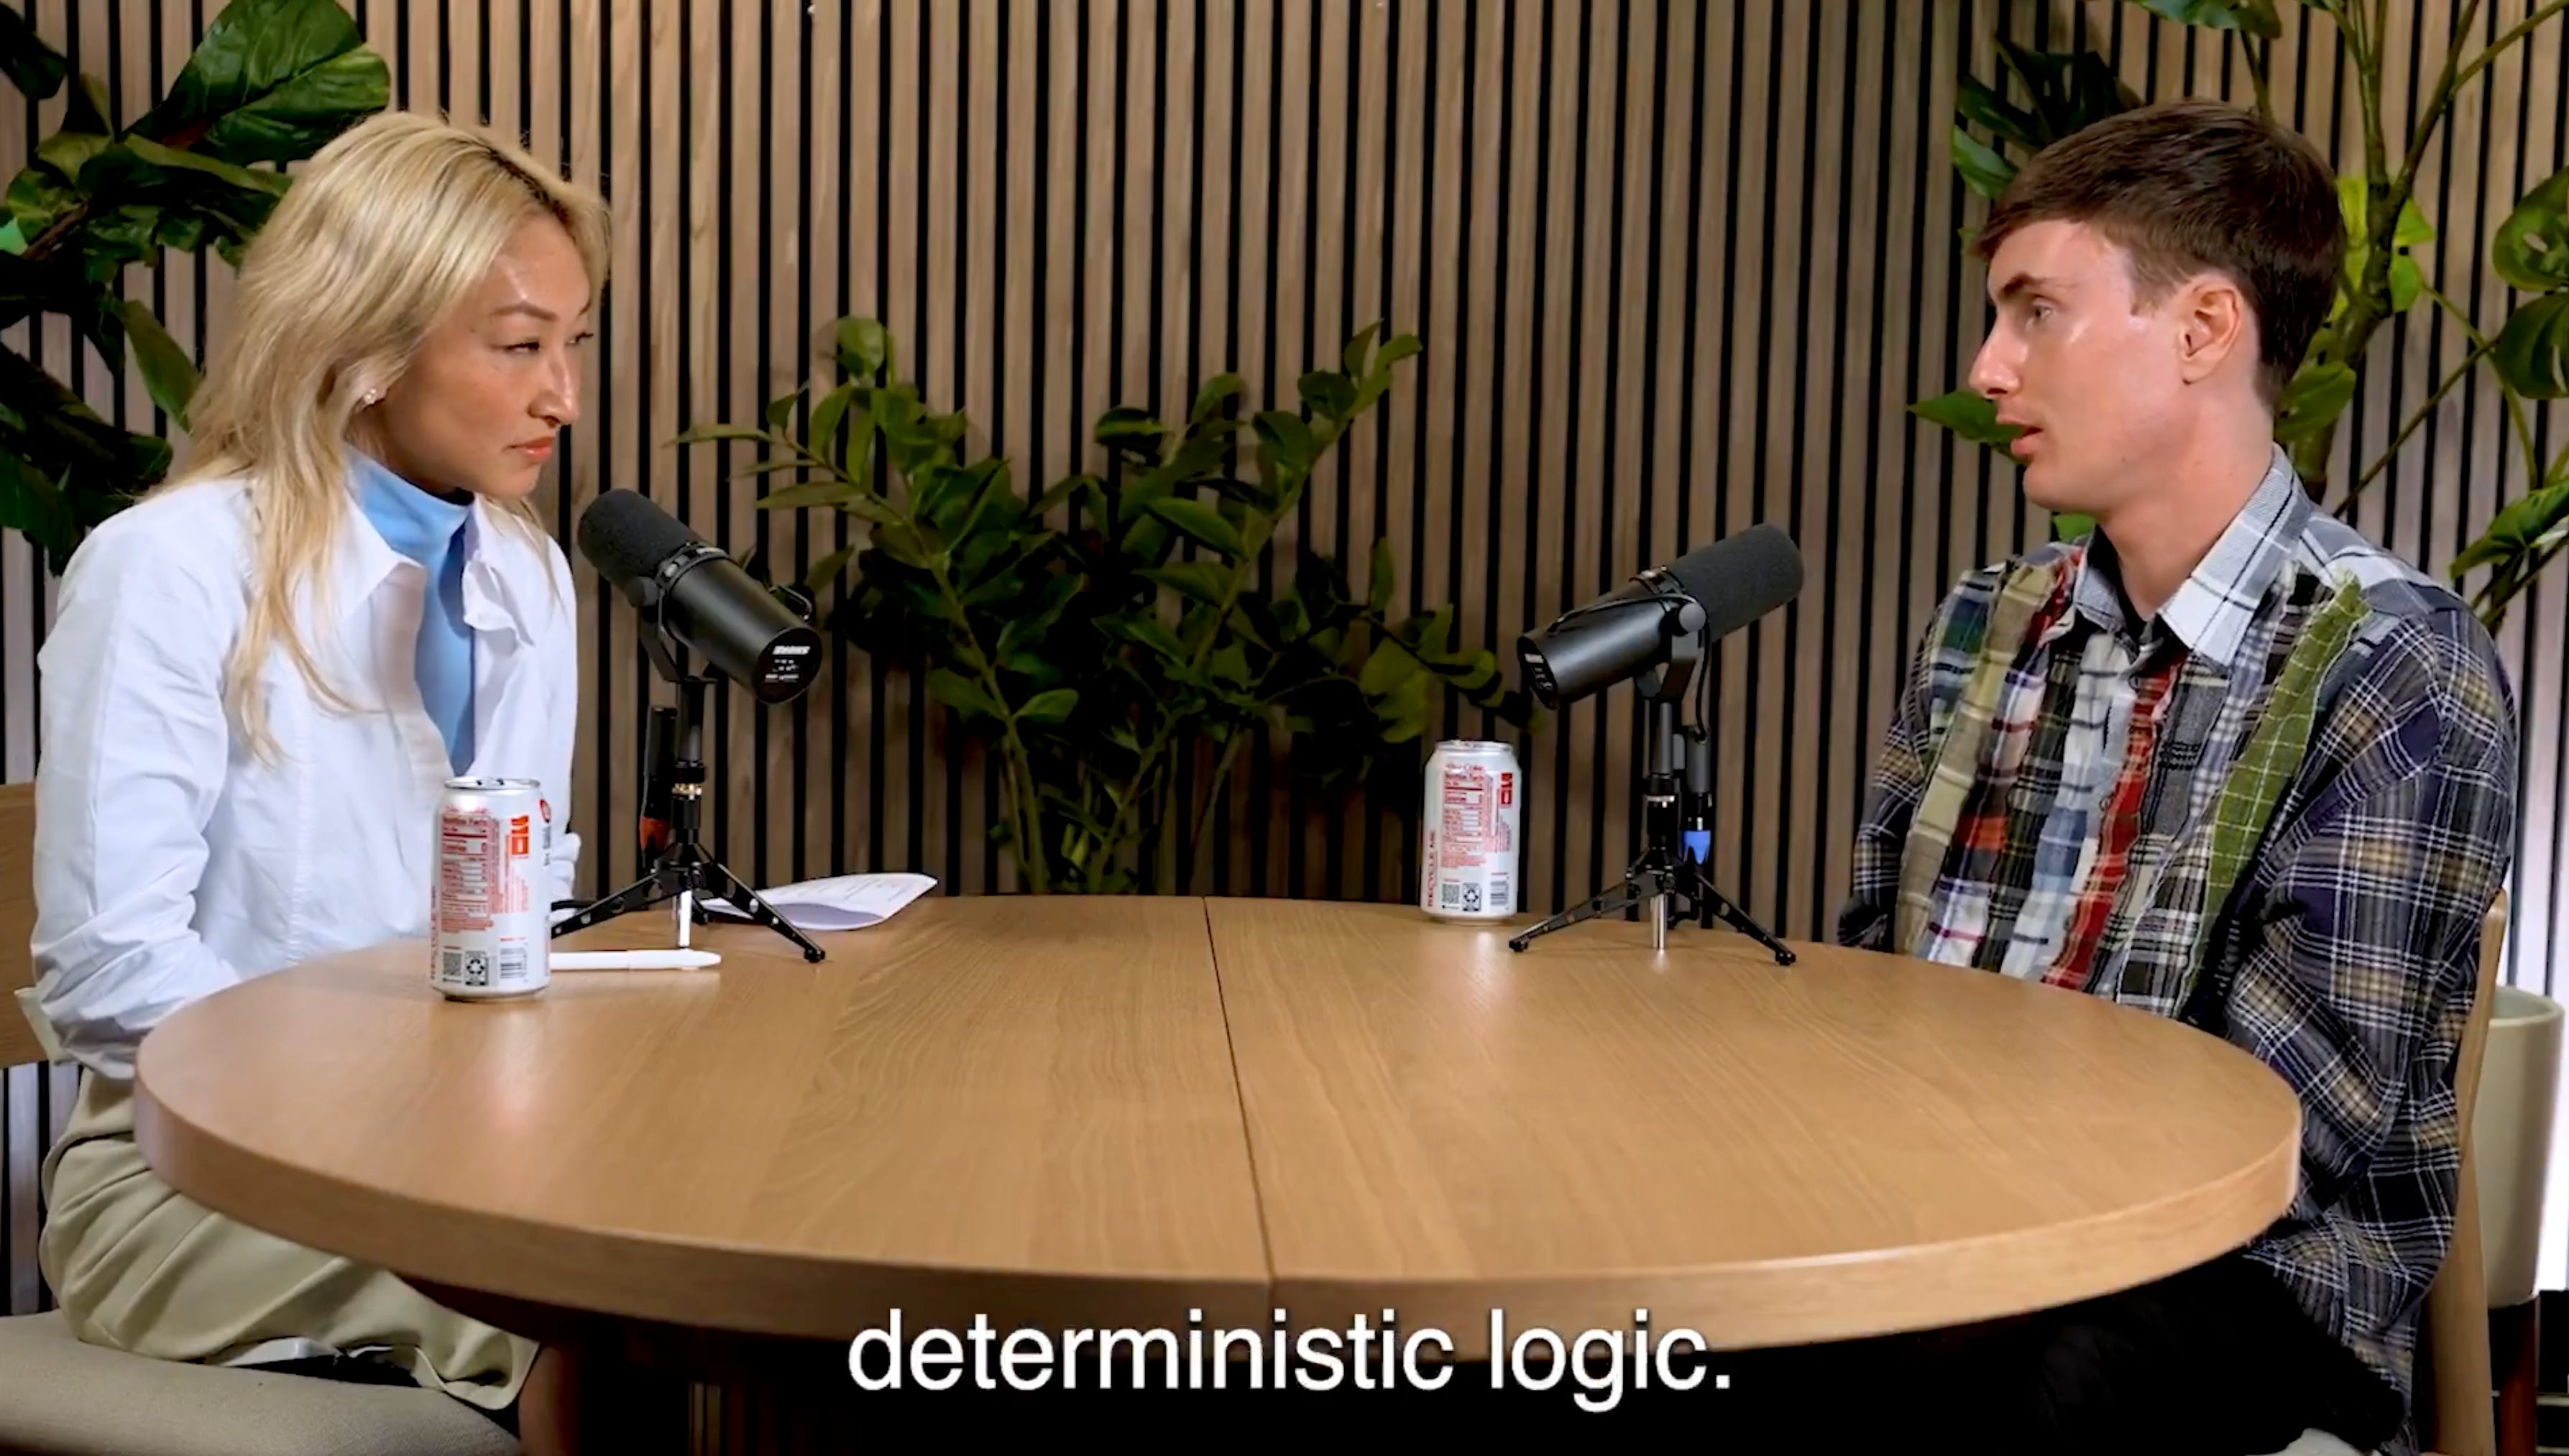
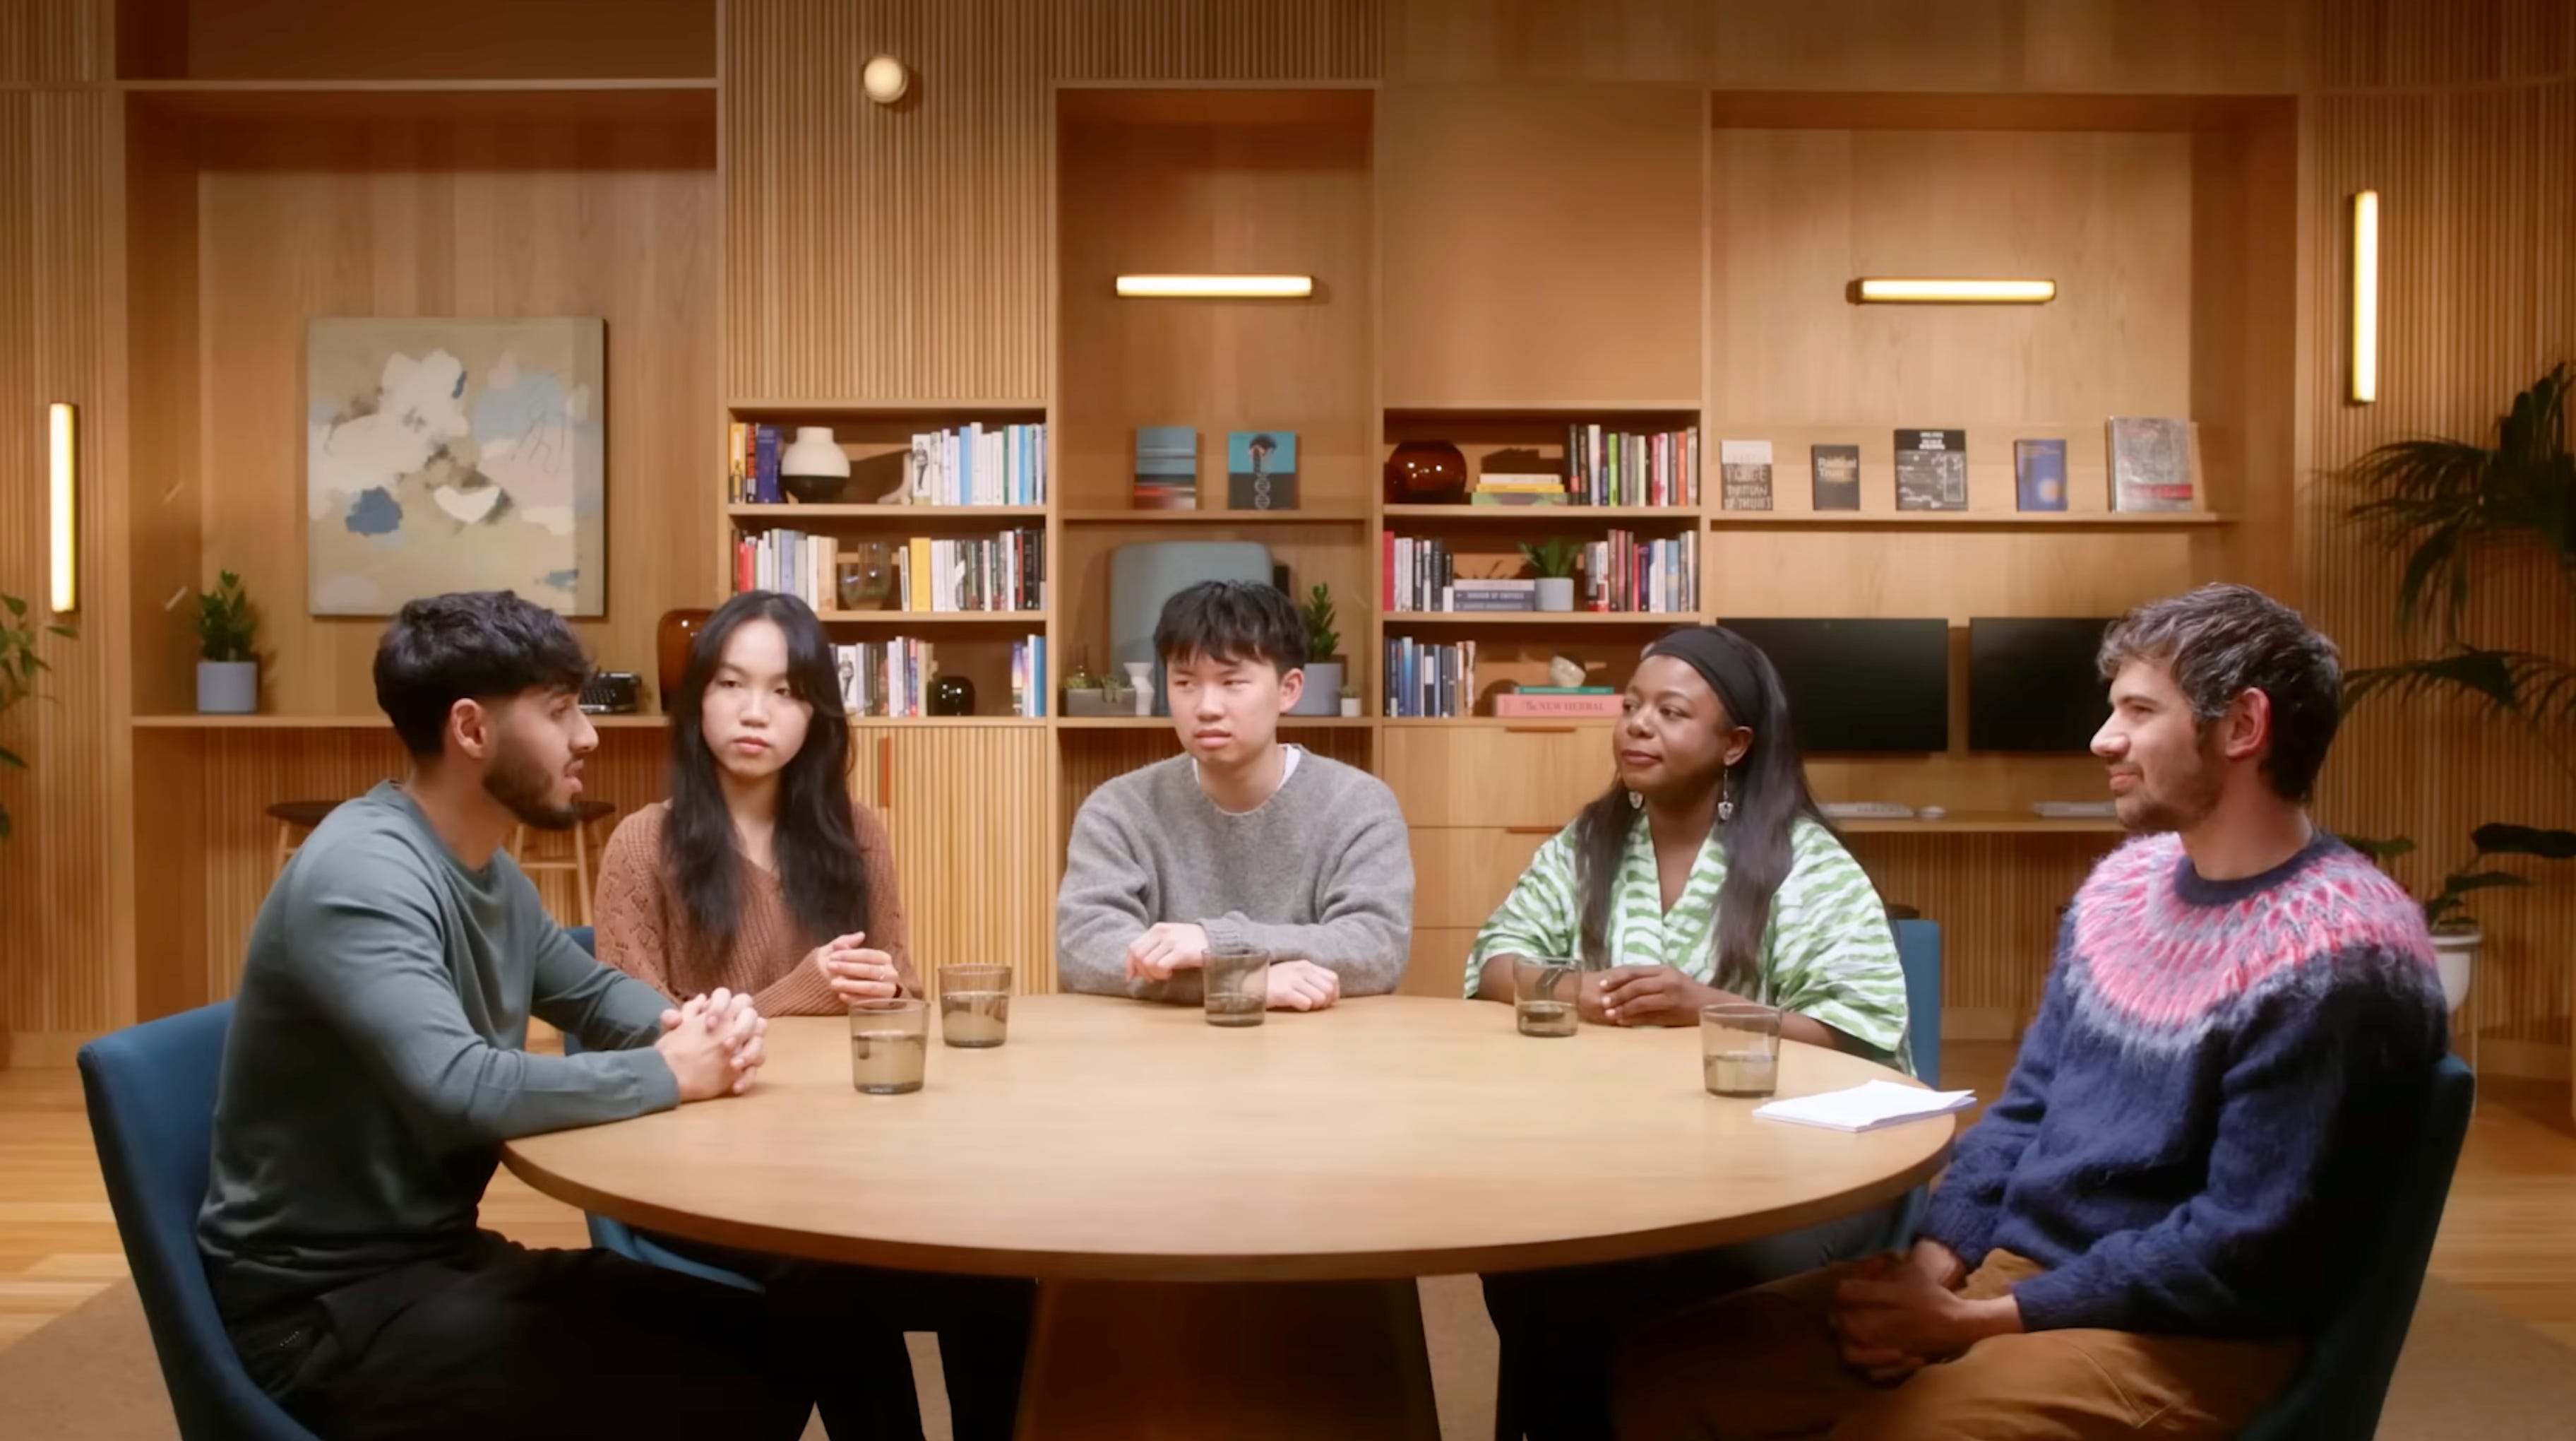
Exhibit D (anthropic youtube — anthropic is doing a good job)
For our studio, we will want to intentionally choose every object that ends up in the frame. The chairs, table, cups, walls, & visible lighting elements. No room for visual clutter, everything is load-bearing. And somehow avoid being visually trite, while avoiding overinventing for the sake of it.
Writing & Performance
Every story has a beginning, middle, and end, which ultimately connects to a meaning. There is a problem we stay to watch get resolved; when it is resolved, we are done watching.
Let’s look again at the Jia piece. It’s so short and simple that it is a good learning ground for basic dramatic structure.
A dramatic “beat” is the smallest unit of change in a story — a shift in emotion, relationship, understanding, or stakes. These beats are what keep people watching.
Here’s where they are located in the short Jia video:
2s — Dramatic Premise: “Moved to San Francisco and didn’t know anyone.” The story is set in motion.
6s – Escalating Conflict: Dropping internships at Disney and Intuit to chase startups. Stakes and desire appear.
20s – Deep Empathy: Real stutter kept in — vulnerability makes her relatable.
26s – Breakthrough: “And surprisingly this worked…” We feel the character progressing.
47s – Resolution: “All that matters is just who you are as a person…” Everything pays off with meaning.
If your video is missing some sort of dramatic spine, it will sit inert and be unwatchable. You have to create stakes that are true to the thing you’re talking about. They often won’t be that compelling. And that’s ok. They just need to be there, and you need to have considered it.
Sound
Sound is deceptively difficult to do well. There’s a difference between dialog that is legible, easy to hear, and dialog that puts us in the room with the speakers. For our studio, we need clear and crisp dialog, while also creating a sense for the spatial logic of the room.
Here’s a sample where the room’s spatial logic is expressed in the sound:
Notice how every piece of the frame is controlled. The chairs, table, glasses, clothing, my clipboard — are all in conversation with each other. Everything has been designed to support the story and accentuate focus on the speakers. Also, notice how the footsteps pan & have spatial integrity to where they are coming from in the frame. These sound choices are logical to the scene and, most importantly, put you in the room.
Score (Music) & Color
Finally, we’ll touch on score (and throw in coloring as a quick note). I have a sample from a 6-part series I shot with Arlan (again). Below is a 2-minute commercial spot for Nia’s research paper parsing functionality. The ambient score accentuates the depth of the room, creates curiosity, and has a slight volume scoop at the start when the camera smoothly snap-tilts up to reveal Arlan’s eyes.
Performance, cinematography, and score all cooperate to create a viewing experience that moves in lock-step. For content coming out of our studio, we’ll be shooting on static cameras (no movement, unless an operator is on-site), but the same principles of score coordinating with transitions / setting / story apply. It’s all 1 cohesive thing.
For color, here’s the before and after (with notes):
Principles, Not a Blueprint
The above just covers the core principles that make contained film work like this compelling. Even in a simple, fixed, studio setup like this, good performance, production design, cinematography, score, & sound — can make something worth watching.
The Build
So now let’s build our theoretical studio. It will just be a person sitting in a chair with 2 cameras pointed at them. A medium shot (to capture environment and body context), and a medium close-up shot (to capture facial expressions and character interior). Really simple.


Our studio needs to solve 9 fundamental problems:
Image Capture: We need cameras. With the right lenses. On tripods. With continuous power and memory to record to.
Monitoring: We need to see the image we are capturing on a big screen. On a tighter budget, this is optional, but a display monitor gives us the ability to see multiple camera feeds at once, from 1 physical standing position. We can clearly judge:
framing
composition
exposure
contrast
color
focus
background separation
Sound: We need to capture dialog with clarity and presence. Both are achieved via proper mic placement.
Clarity is ensuring every word is intelligible without effort. Listeners shouldn’t have to work to understand what’s being said.
Presence means the voice feels like it’s coming from a real person in a real space. The dialog quality creates a sense of “being in the room”. Many clip-on mics produce functional audio, clear and intelligible, but you feel like you’re listening to a clip-on mic. A properly placed boom will put you in the room with spatial bearings.
Lighting: We need to (1) expose the speaker’s face with soft light, (2) add texture to the backdrop / back wall to accentuate the focal point of the image, & (3) add any other practical lighting to the scene to distribute sources of exposure throughout the frame, creating more depth to the overall image.
Production Design: For our minimal studio, we’ll just have 2 production-design elements (1) a hand-painted muslin tarp backdrop, held up by stands, and (2) a chair. just a straight-up single chair, to sit on. That’s it.
Power: We will need to distribute power to our cameras (for continuous power), monitor, sound mixer, and lighting.
Safety: We will need sandbags for any stands (so they don’t tip over).
Set Management: We’ll want spike tape to mark the position of cameras, lighting, furniture, and chairs (so we can restore the frame at any time and just hit record). Gray card for white balance, zipties for cables, clapper for audio sync.
File Storage & Transfer: We need a continuous system for getting footage from camera cards to post-production reliably after every shoot. Hard drives for on-set storage (SSDs if you have the budget). Optionally, a Mac Mini can live at the studio for full-resolution cloud file upload (more on this later).
Each section will start with the shopping list, then I’ll explain why I made the choices I made.
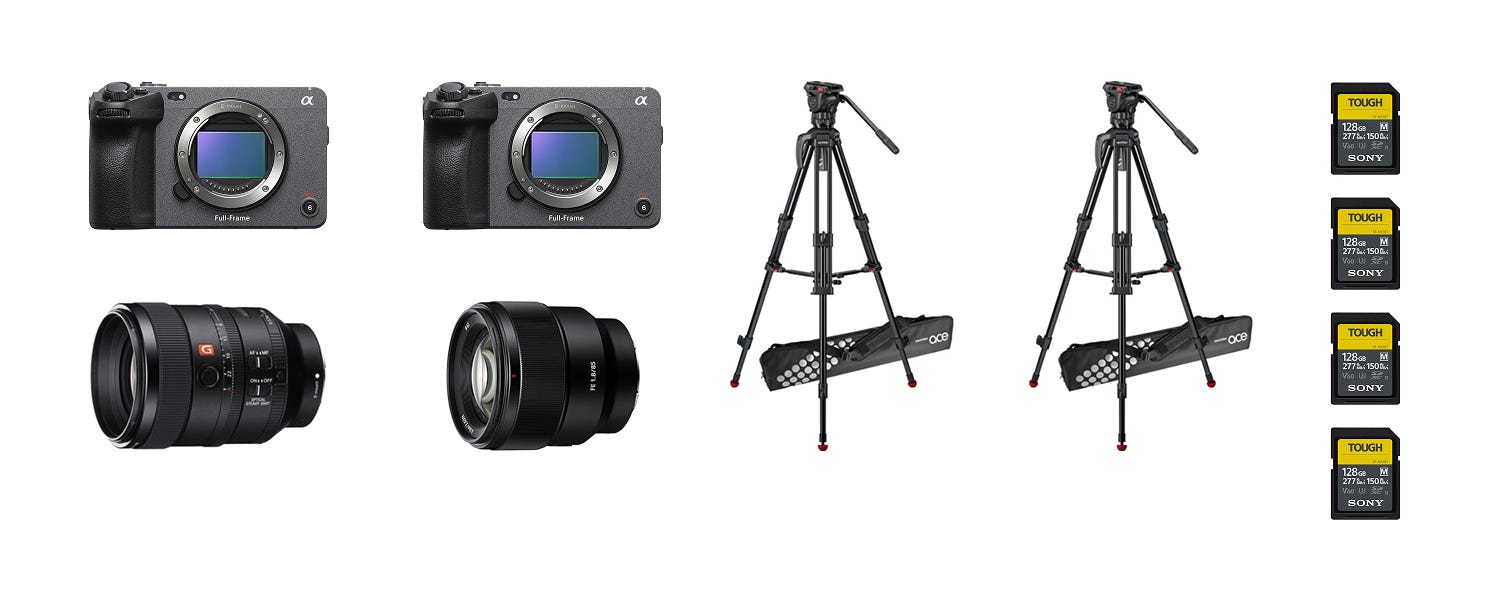
Image Capture (shopping list)
shopping list
Sony FX3A (2x) (link)
Sony 100mm f/2.8 STF (link)
Sony 85mm f/1.8 (link)
Sachtler 75/2 Mark II Aluminum Tripod (2x) (link)
Sony 128GB SF-M Tough Series UHS-II SDXC Memory Card (4x) (link)
Camera + Lenses
You don’t need a professional cinema body like an ARRI Alexa, or Sony Burano. And you don’t need cinema lenses.
The highest you need to go in camera body is an FX3, and for glass, Sony lenses. Most character in color, contrast, and texture can be added in post-production. We just need a clean, flexible image.
Lenses
The 85 & 100mm both flatter the face (as telephoto lenses do) and have a controlled, compressed look that create focus on the subject. Both are close in focal length, so that cuts between the angles feel controlled and have similar environmental compression. The 100mm STF renders the background with unusually smooth falloff and can be used for either the medium or medium close-up.
Tripods
Sachtler is a long-standing camera support brand that makes excellent tripods. There are cheaper options on Amazon, but if you’re going to place a $6,000+ camera + lens on something, you want it to be very, very stable and reliable.
Cheaper tripods break down over months as you open and close them. Although our studio cameras will never move, better to just buy it right once. Or…get a cheaper tripod if you want. It will break on you eventually, but it will be delayed relative to how much you open and close it (I’ve had 3 cheap tripods off Amazon deteriorate on me over ~6-12 months of use).
SD Cards
The Sony TOUGH cards are molded into a single durable piece and are unlikely to break. There are cheaper options for cards that have write lock switches (which are undesirable). Really up to you, the studio isn’t moving anywhere, but I just like buying what will last (especially because this is a professional/commercial setup).
Monitoring (shopping list)

shopping list
Lilliput 31.5” 4K HDMI Monitor (link)
Neewer C-Stand w/ Casters (link)
VESA Mount (link)
35’ HDMI Cable (2x) (link)
HDMI Right Angle Adapter (2x) (link)
The Stand
The VESA mount grips the back of the monitor (4 screw holes), then clamps to the top of the stand. The stand is rollable so people can move the image around so anyone can see.
The Cables
SDI is the professional standard for moving video over cable. Teradek for wireless transmission. The FX3 does not have SDI, so we use HDMI. HDMI will come out of the cameras and go into the back of the monitor.
We use right-angle adapters to reduce strain on the FX3’s HDMI port and keep the connection secure.
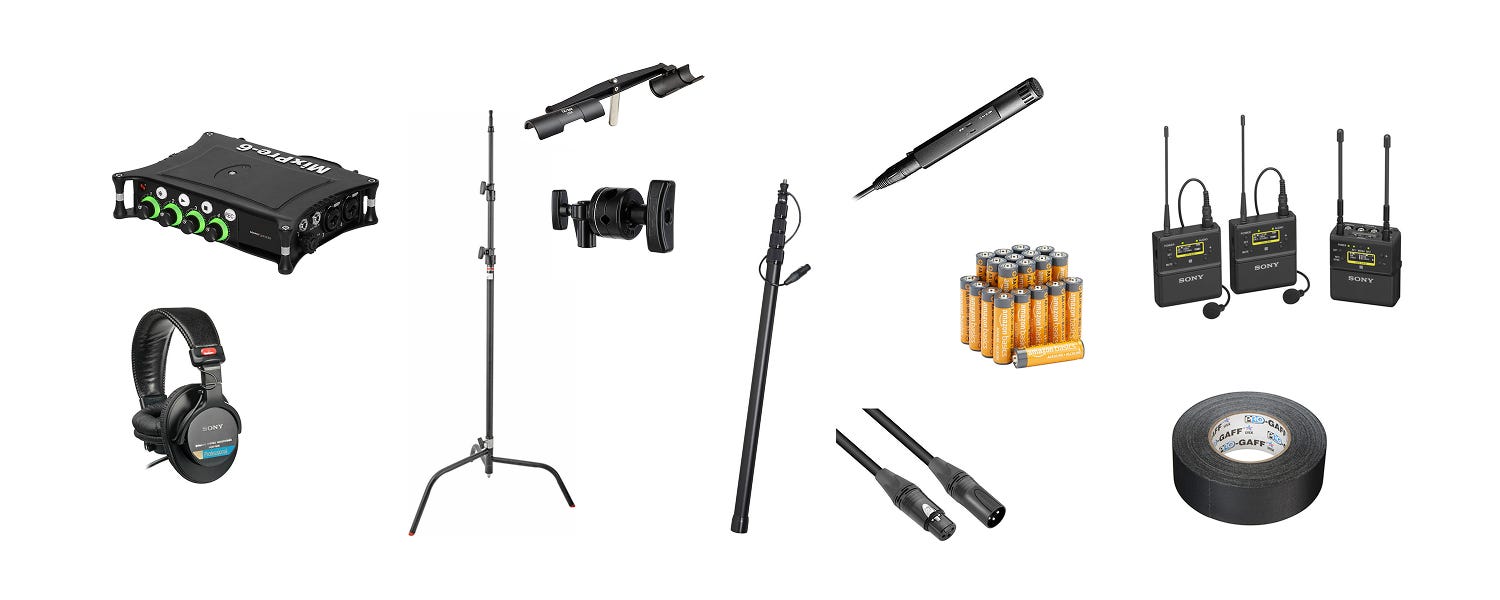
Sound (shopping list)
shopping list
MixPre-6 II (link)
Sennheiser MKH 50 (link)
K-Tek Boom Pole (link)
Matthews C-Stand (link)
Matthews Grip Head (link)
K-Tek Boom Cradle 2 (link)
XLR Cable (25') (link)
Sony 2x Lavs + Receiver (UWP-D27) (link)
Sony MDR-7506 (link)
Gaffer Tape (55yd) (link)
AA Batteries (20-pack) (link)
Overview
All sound goes into a mixer. It can record up to 8 tracks (support multiple speakers). XLR connectors are the professional standard for moving audio. Boom mics (the ones you see operators with poles on movie sets move around) provide superior audio with a rich frequency range. When you think “that audio sounded like a movie,” it almost certainly came from a boom microphone. The FX3 supports 2 XLR inputs and one 3.5mm input (which you can’t use at the same time as the XLR inputs). We will not use any of these and instead rely completely on the mixer to record audio.
Boom Mic
The Sennheiser MKH 50 sounds natural, rejects room noise well, and makes voices feel like they exist in a real space. I personally love the DPA 4017b’s for their superior clarity and detail, but they’re on the pricier side.
The boom mic attaches to a mount that comes with it (you can get a shock mount if you want, but optional) → that mount has a female screw, the boom pole screws into it → the boom pole holder cradles the boom → the boom pole holder is gripped onto by the c-stand grip head → the c-stand grip head goes on top of the c-stand (5/8” baby pin) → XLR goes from the boom pole (which has a female XLR port) into the mixer.
Boom Mic Placement
The most important thing for sound quality is mic placement. Worth repeating because it will save you hours and hundreds of $$$ of post-production headache and disappointment. The most important thing for sound quality is mic placement.
You will position the boom above your subject (yourself, probably), with the boom pointing down from above at a 45° angle. Pointing at the chest / mouth area. Slightly in front of the mouth, where the sound is traveling. 6-12 inches from it. The closer the better. Every inch matters.
This has real commercial consequences. A wrong mic placement capturing too much room audio will lead to lower video retention and lower reach simply because it is harder to hear the speaker. Rich sound capture stands out on a timeline of videos with poor sound capture.
I can’t stress how easy this is to get wrong. If I’m not there or a good video person you know isn’t there to check the audio, it is deceptively easy to let mediocre audio capture slip by unnoticed. Because it will sound functional and “just work,” but it won’t wow you. It should wow you and call you to attention.
Lav Mic
I added a lav mic for backup, so you’d run both a boom ++ lav mic for redundancy into the mixer. The Sony UWP-D27 has a receiver that will run a 3.5mm jack into the mixer.
Lav Mic Placement
Place the lav on the chest, centered, 6-8 inches below the mouth. A lot of great videos on YouTube on lav mic placement. It’s truly an art.
I included gaffer’s tape for securing the mic wherever you put it.
Monitoring
Headphones for monitoring (industry standard). Another rule that will save you a lot of pain and despair: always have someone monitor the mixer live while filming. Anything can happen while recording; you have no idea what sound is being written to those cards unless live ears are listening. A cable can malfunction, the mixer can get unplugged, the mic placement might drift, there might be ambient noise running you don’t notice, but the mic will capture it clearly.
If you’re filming solo, at least have eyes on the gain levels of the mixer, make sure things are flashing and alive, and…working.
Dialog Editing
Additional note — going through an additional step of dialog editing can make a night and day difference in the clarity and presence of your final dialog (think “sounding like a Super Bowl commercial” vs “sounding like a YouTube video”).
Here is a before (no score) and after (dialog polish + score + mix) of the “research paper” video with Arlan. Notice how before, you feel like you’re in a big echoey room. It pulls you away from focusing on Arlan’s words, and instead, your attention goes to your position in the room. This could be the right story decision in other cases, but in this case, it only detracts from getting our message across.
After dialog polish, you feel like you’re “inside his voice,” receiving it directly. You’re locked in on his words, and your attention does not drift elsewhere.
Lighting (shopping list)
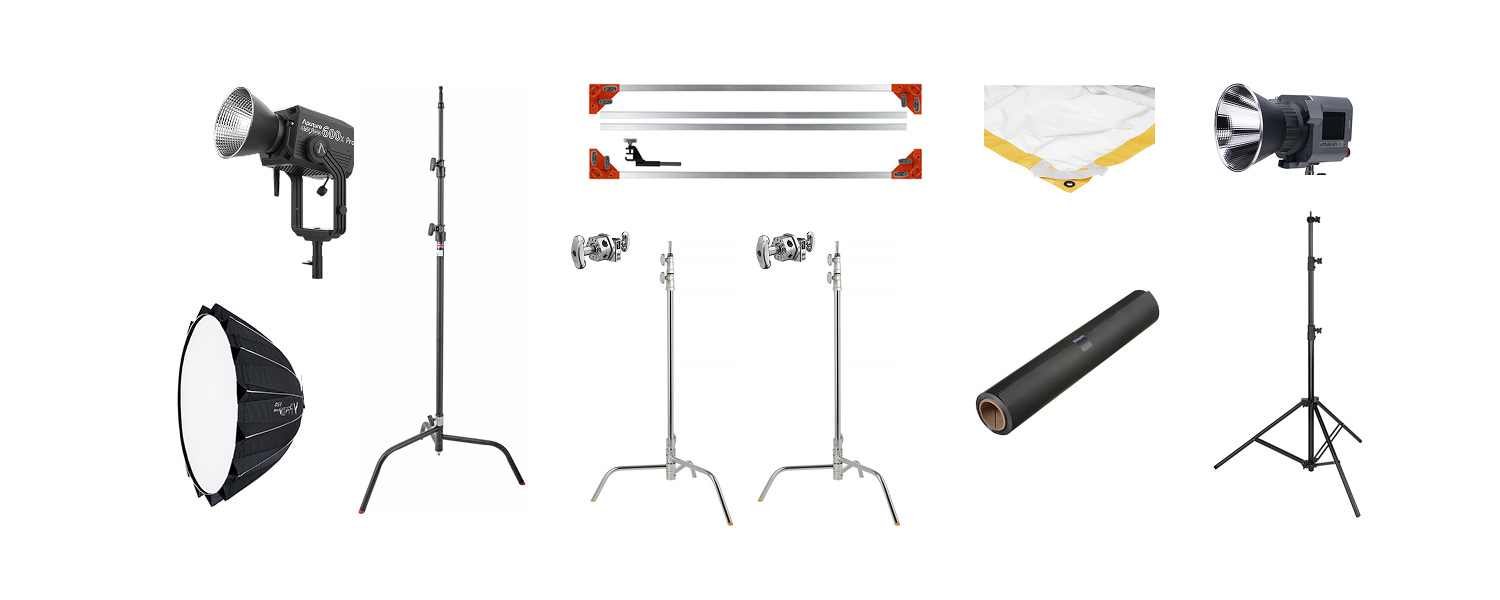
shopping list
Aputure 600c Pro II (link)
Matthews C-Stand (link)
6x6 silk diffusion rig
OR, softbox
Aputure Light Dome (5’) (link)
Amaran 60x Bi-Color (link)
Impact Light Stand (link)
Cinefoil (link)
Key Light
So let’s revisit the medium shot on our studio subject (I pulled this still from Shotdeck, a shot reference site filmmakers use).
When lighting this scene, we need to think about 3 planes of exposure (1) the subject (torso + face), (2) the backdrop, & (3) the overall room (ambient).
There are 2 lights active in this setup. (1) There is a big diffuse “key light” coming in off screen-right to expose the subject’s face & torso, and (2) there is a light coming in off screen-left to add texture to the backdrop (near the focal point of the image, which is the subject’s eyes, siphoning attention center-frame).
The Aputure 600c will be our key light for the subject. It is powerful enough to overpower strong sunlight coming in from windows to expose our subject well. It will emit a hard light that we need to diffuse. We have many options for diffusion.
Here are 2:
6x6 Diffusion Silk: The wider the surface area of a diffusion fabric & the farther back the light source before it hits it, the softer and more diffuse the light. You can check out this diffusion fabric test on YouTube to see how different diffusions create different qualities of light on skin.
I chose silk because it fully diffuses the light behind it, eliminating hot spots, while preserving the warmth and color accuracy of the source. The Matthews 6 x 6’ frame holds the silk. It is on the pricier side, so you could get away with just hoisting the silk between 2 c-stands (grip heads would bite into the fabric & you’d spread it taut).
There is a big qualitative difference between light diffused by a big silk cloth vs using a softbox. It is more ethereal and cinematic.5’ Softbox: This is an alternative. A softbox attaches to the front of the Aputure to soften the light that comes out of it (it twists and locks to the front of the light, into what’s called a “Bowens mount”). The light this produces is very soft, softer than any smaller softboxes. Still not as great as silk, but it’s a more portable option.
Use the grid that comes with it to control the light spread, keeping it focused on a subject. Keep the grid off if you want to boost ambient exposure in the whole space + behind your subject + your subject themselves.
Foil
The cinefoil is this rigid, aluminum foil-like foil (but much stiffer). Similar to barn doors, it allows you to shape the light coming out of fixtures.
Backsplash
We only need a small light for the backsplash. We can use the cinefoil to shape it how we please.
Hairlight
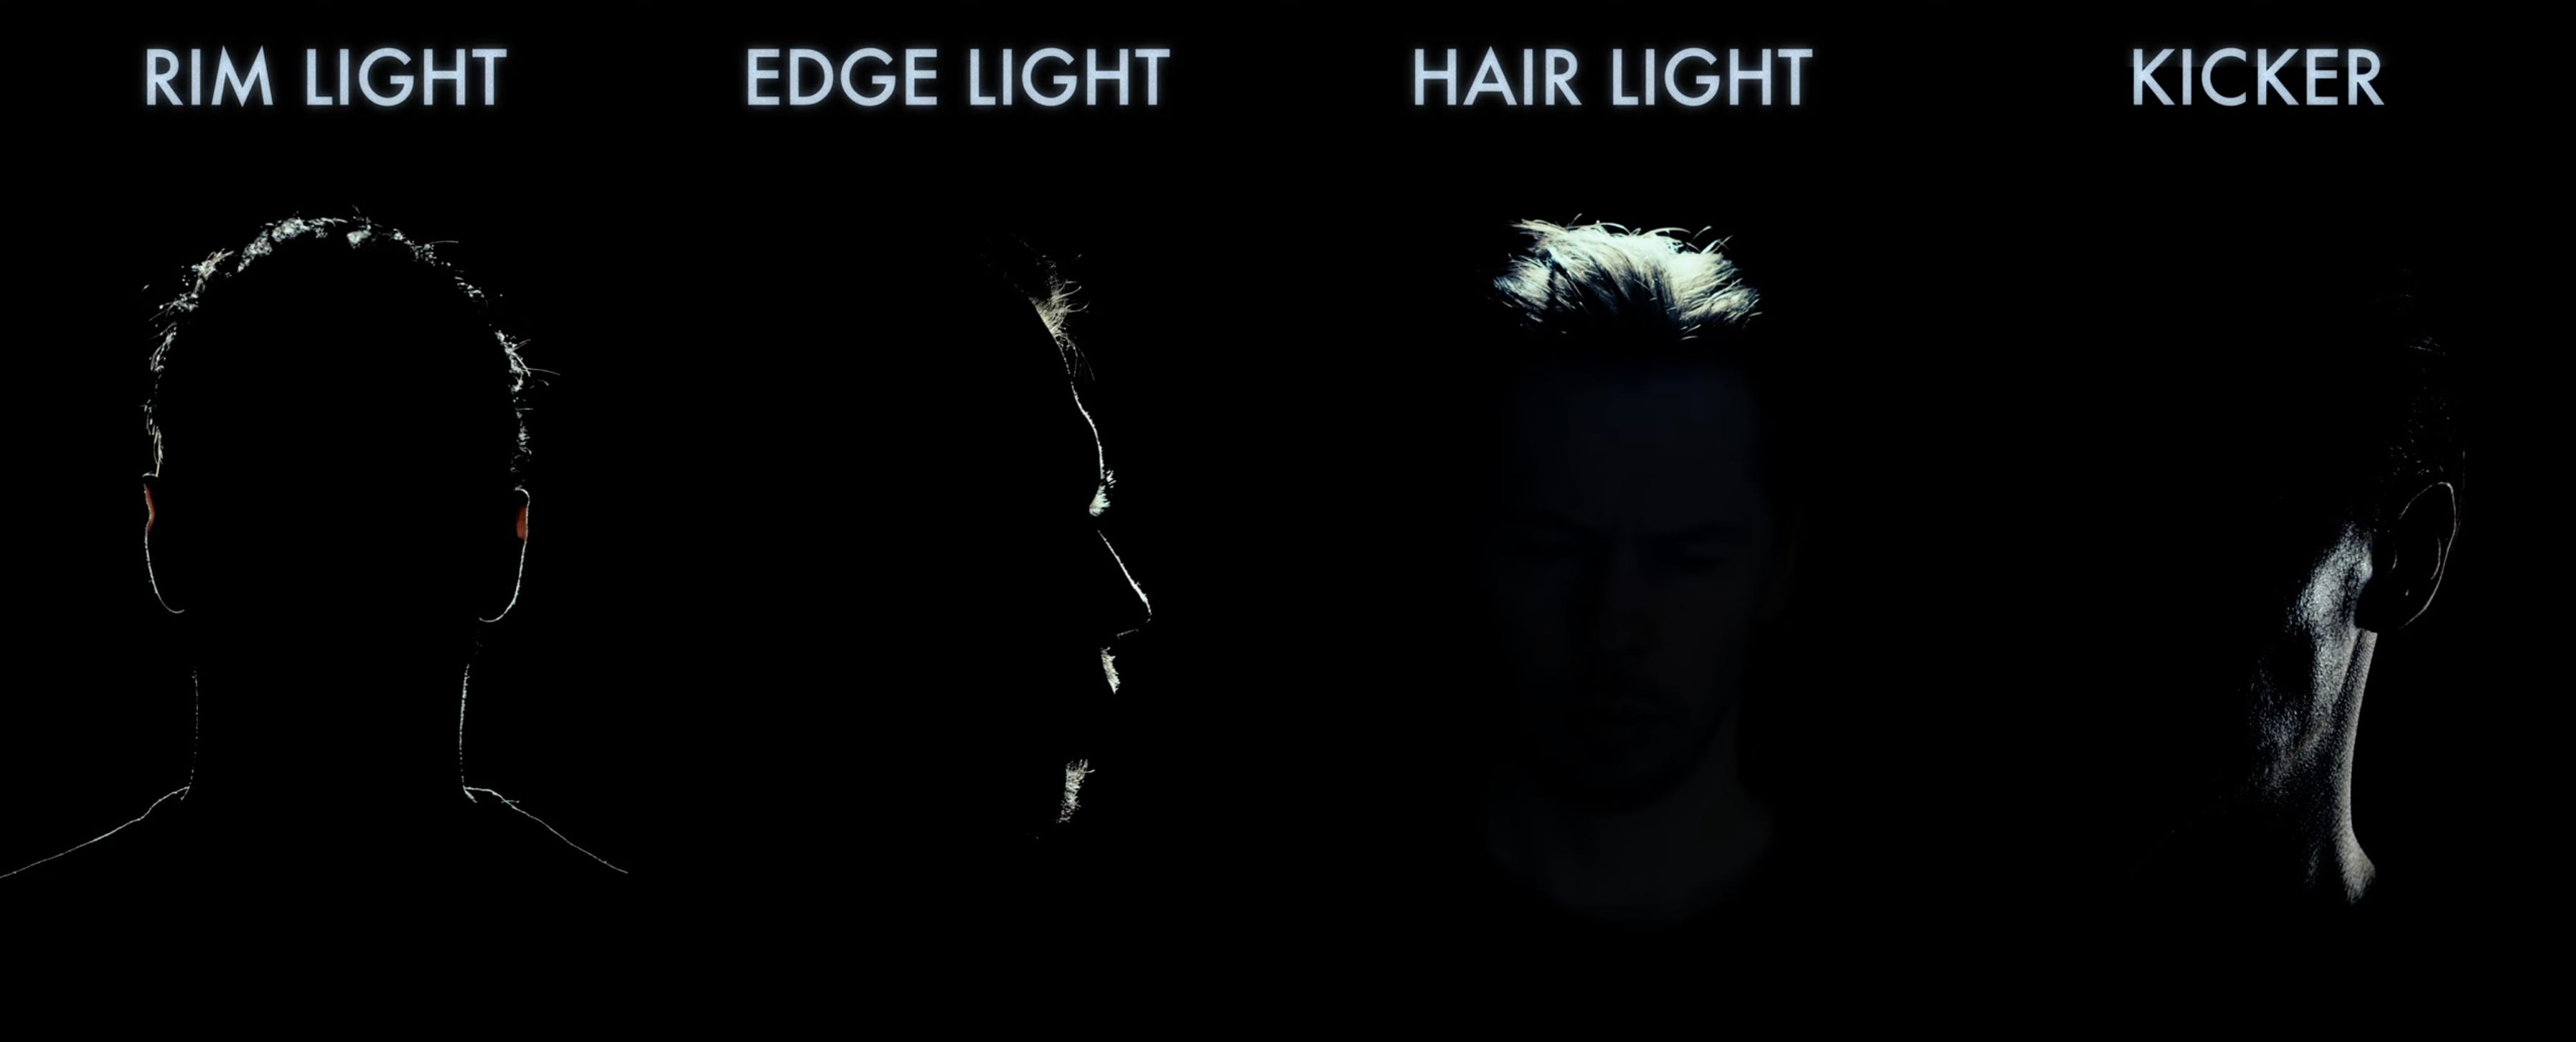
This isn’t on the shopping list, but you can add an extra light, place it behind your subject, and aim it at the back of their head to create a “rim light”/“hairlight”. This creates an accentuated “halo” of exposure behind your subject, creating further background separation and making the image easier to read.
You can also add a touch of light to the shadow side of the face for what’s called a “kicker” to create more dimension on the face. Good video on all this here.
Reading the Face
Our main goal with lighting is to make the face easy to read and give room elements a proper relative exposure. If other elements in the frame are competing for exposure, it will take a longer time for a watcher to parse the image.
Comprehension should be instantaneous, without suppressing other exposures to the extent that the room becomes dark and moody.
Working with a Cinematographer
If it’s in budget, I strongly recommend consulting a local cinematographer. Have them walk through your office, and ask them where placing the studio would be best. They will help you plan around the sun relative to time of day, potential framing, and just overall make the image look great.
You want decisions passing through a real artist’s eyes (which is why most studios and productions in tech look bad; they aren’t passing through a real artist’s eyes, someone who literally lives off making beauty).
Production Design (backdrop + furniture) (shopping list)
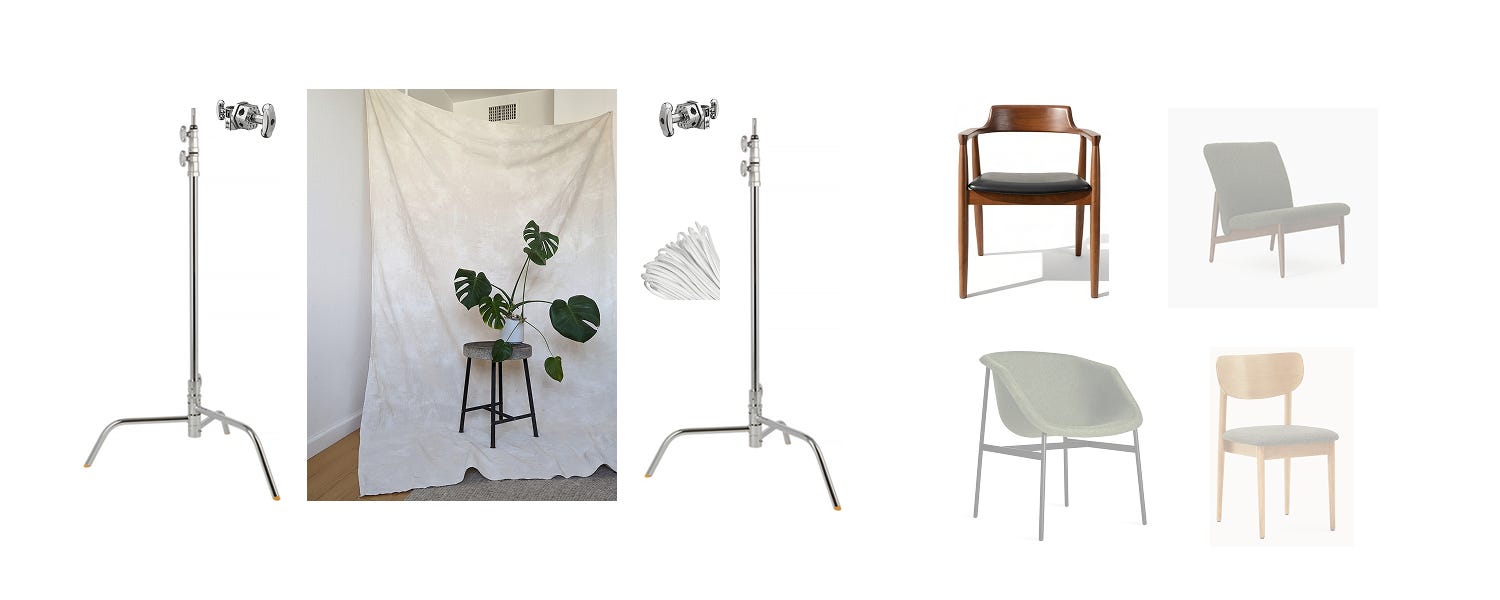
shopping list
Hand-painted Muslin Backdrop (10x12ft) (link)
C-Stand (10’) (2x) (link)
Grip Head (2x) (link)
Paracord 550 (link)
chair options (quickly grabbed these)
Backdrop
We can get the hand-painted muslin backdrop from Etsy.
The main idea is that we want to create a sense of depth while neutralizing background components that are not essential for viewing in the image. Every item in the frame must be interrogated for meaning. Does it improve the frame’s balance? Visual rhythm? Distribute colors better? Reveal environmental information? Or is it just there to be there? In the final case, it should always be removed.
Chair
A chair. As always, color, texture, material should work with the overall set.
If you want, we can add a table, then put a laptop on it.
Working with a Production Designer
The production design is most of the viewing experience for a fixed setup like this. If you want a custom-tailored solution that looks cinematic, you need to consult with a production designer. If you just place stuff around yourself, it can work…but it usually won’t look great.
A production designer will bring a trained eye to the space — someone who thinks about color, texture, and object placement as visual language. Worth the consultation fee for the first build.
Power (shopping list)
shopping list
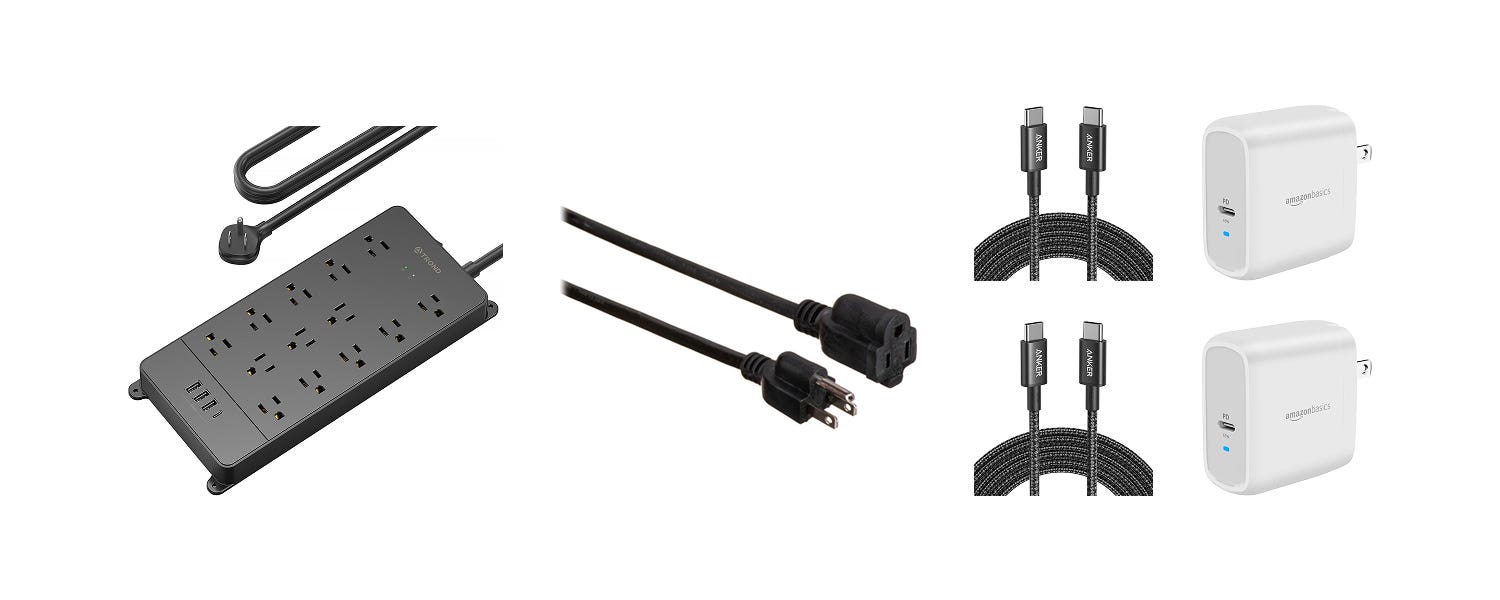
Power Strip (13 outlets, 15A) (link)
Extension Cable (25’) (link)
USB C to USB C (10’) (2x) (link)
USB-C Charger (65W) (2x) (link)
Pretty Simple
We get continuous power to the 2 FX3s via USB-C cables connecting to power bricks. Batteries stay inside the cameras in case the power goes out.
We have a power strip to power the monitor, the 2 lights, and sound mixer.
Safety & Set Management (shopping list)

shopping list
Sandbags (20lb) (8x) (link)
18% Gray Card (link)
Spike Tape (link)
Hook & Loop Cable Ties (50x) (link)
Clapper Board (link)
Sandbag C-Stand Legs
For safety, we want to place at least 1 sandbag on the biggest leg of any C-stand (the side that is bearing weight). The “biggest” leg will be the one highest up in the “ring” of legs (you’ll know what I mean when you’re looking at the stand). This is most important for the backdrop & our big Aputure key light, those falling on anyone would be very bad!
By the way, here is how you use a C-stand.
Other Things
Gray card to set white balance, spike tape to mark positions of set items (for repeatable frames), slate to sync audio (or you can just clap your hands), and zipties to manage cables.
File Storage & Transfer (shopping list)
shopping list
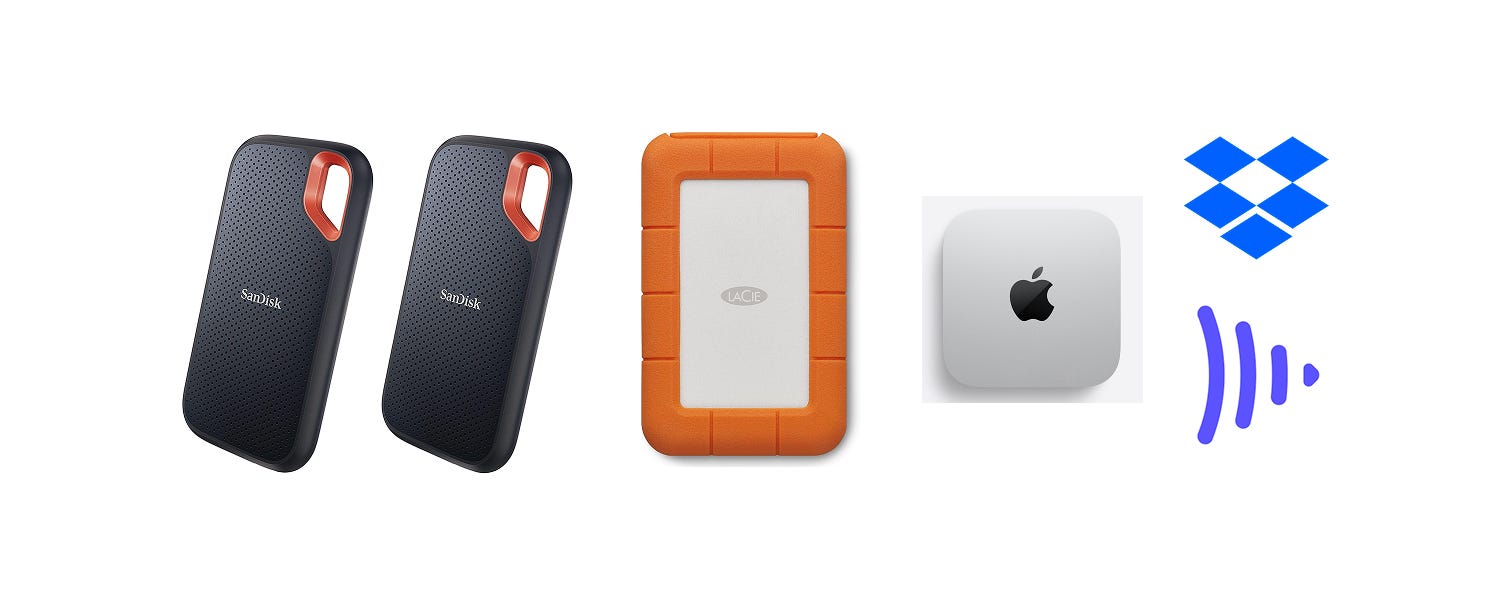
Sandisk 2TB SSD (2x) (link)
LaCie 4TB (link)
Dropbox Plus (link)
Frame.io Pro (link)
optional
Mac Mini M4 (link)
File Transfer (Streaming Proxies)
Finally, we come to file storage and transfer. Pretty simple. We will use Frame.io’s “Camera to Cloud” to stream low-resolution files (called “proxies”) straight off the cards (literally as we are recording) to our editor. By the time the shoot is over, they will have all the files they need to begin the edit. Editors work with proxies until a final conform step, where low-res files are swapped for full-res so that color-grading can be performed.
Full-Res Storage + Transfer
Someone in the studio will have to take the cards out of the camera and move the full-res files to the cloud. Dropbox can auto-watch a folder on the studio machine to auto-trigger cloud upload. The editor will download the full-res files from Dropbox.
Locally, we will make 2 copies of the footage onto SSDs. This is standard redundancy when taking footage off a set. The stakes are lower here and you can be less cautious if you’d like keeping only 1 copy.
SSDs are much faster than HDDs. You can use hard drives if you want; they are much cheaper.
Recap
So to recap:
Proxies via C2C: Stream low-res files to Frame.io during the shoot — editor can start before you’ve packed up.
Full-Res Offload: Cards pulled after the shoot, copied to 2 SSDs for local redundancy.
Cloud Upload: Dropbox auto-watches the studio machine and uploads full-res files automatically.
Final Conform: Editor swaps proxies for full-res masters from Dropbox before color grading.
The above minimizes time to first rough cut.
Network Attached Storage
At some point, you will outgrow using individual hard drives. You will want a NAS (Network Attached Storage) — a device that sits on your local network with multiple drives in a RAID configuration, automatically mirroring data so a single drive failure never costs you footage. Synology is the standard brand. I haven’t set one up myself yet, so when that day comes I’ll just watch a YouTube video or ask Claude what to do.
Studio Grand Total
So the total (on just equipment) is close to something like this:
Camera: $12,700
Monitoring: $1,900
Sound: $4,800
Lighting: $3,600
Backdrop: $500
Furniture: $500
Power: $100
Safety: $200
Accessories: $60
File Storage & Transfer: $1,600
Grand Total: ~$26,000
To put this into perspective, $26,000 is roughly what a single mid-level marketing hire will cost for 3 months — before benefits, equity, or ongoing salary. This studio produces content for years.
You can find ways to reduce costs, recheck the list, and remove what you don’t need.
After the Shoot
The above just covers production costs (there’s no pre-production since you’ll just walk in and shoot from a light script). For post-production, you need to budget for original score (or music libraries), dialog editing, sound mixing, color, graphics & motion, and subtitles / captions. Post-production is out of scope for this piece.
I’m planning to write a future piece, “Film Production for Founders: What It Costs,” that goes in-depth on what every piece of production costs for both the producer and the end-client. So you can know exactly what your producer is budgeting against.
Good Content ≠ PMF
This is sort of an obvious disclaimer, but if you’re pre-PMF, building a content studio shouldn’t be at the top of your list; it should be talking to customers. Good storytelling is important at any stage, but permanent infrastructure is a longer-term bet when there is a product worth telling a story about.
AI
Will AI replace the need to do all this to capture image and sound for something this simple? Yeah, probably. But the deeper you go into the stack of creative decision-making: cinematography, production design, writing, performance, score, color, editing rhythm — the more the combinatorics compound against getting a satisfactory result end-to-end.
Performances in physical space, with someone coaching you through how you come off in real-time, will also be hard to replace. But it’s precarious to be too sure about anything. For now, all you need to know is this is how you’d do it today, and this is what it would cost.
Go Build
So that’s it. If you’re a startup founder or venture fund that’s been considering building your own content studio, this is everything you need to consider or buy. It’s a deliberately simple setup. No complex considerations, no crew of 20, no Hollywood budget. All that’s necessary is a considered space, the right gear, and a commitment to show up consistently.
I’ll be working with 2 startups or venture firms to build their studios in Q2. Each build will be unique — I’ll work with a cinematographer and production designer for the initial build, then stay on as a creative lead for ongoing content. If you want to be one of them, DM @bephrem on X. If you’d rather build the studio yourself, everything you need is in this piece.